
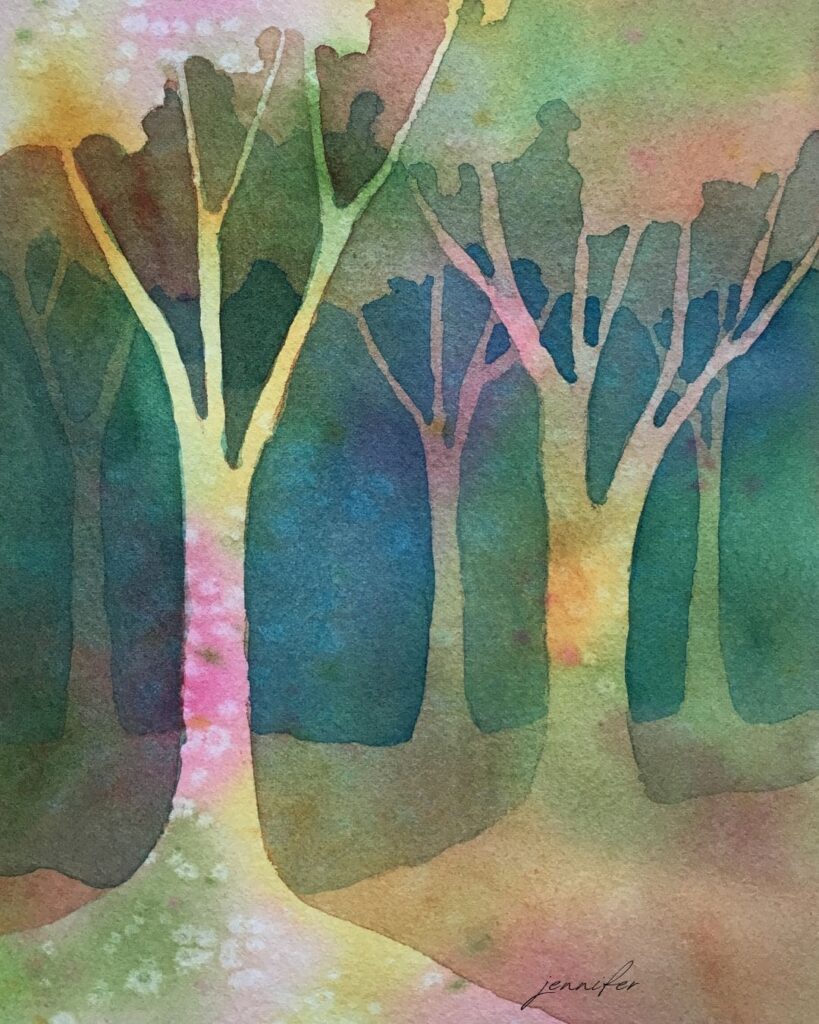
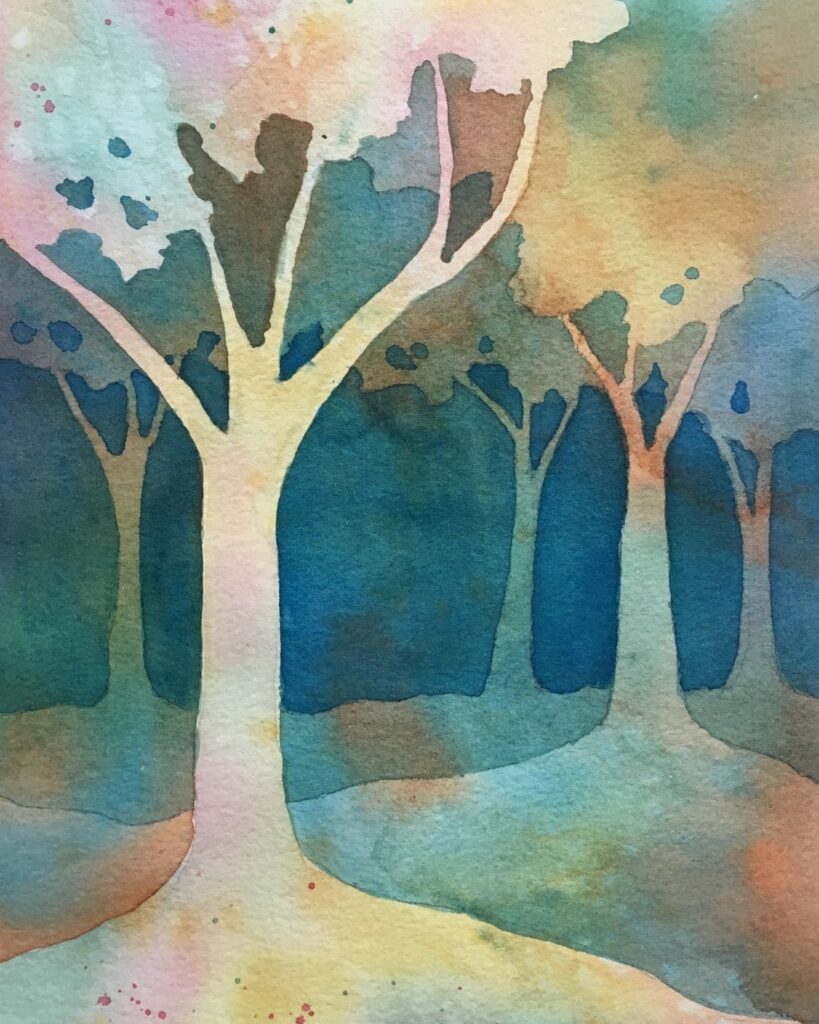
Learn the basics of negative painting by creating a forest of trees and build depth with layers of glazing. Add a little salt for texture. The image below is from a class demo I did and has become one of my most popular pins on Pinterest, inspiring the following tutorial.
Negative painting can feel a bit tricky at first because we are used to looking at objects, not the space around them.
However, this basic tutorial will help you get the hang of it in no time. It’s a really useful trick to improve your drawing accuracy, and you can use it in your paintings as much (or as little) as you like.
We’ll start with a simple design so you don’t get overwhelmed by complex details. After that, I’ll share more examples to inspire you to try out your own ideas!

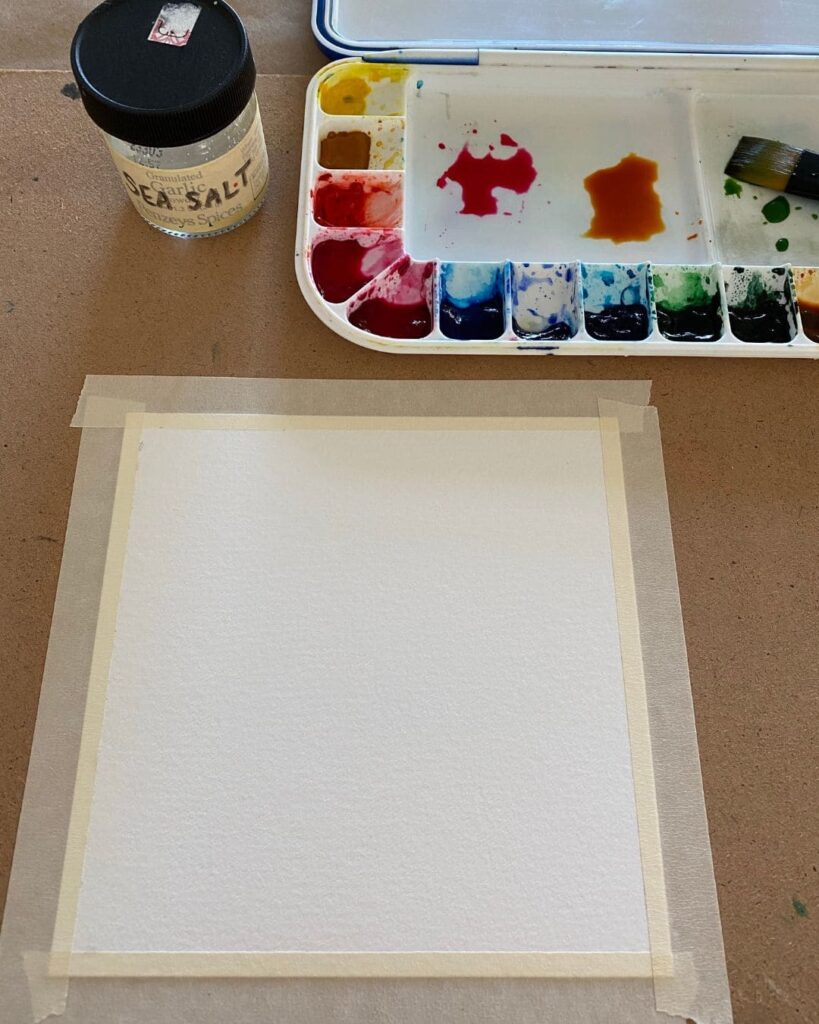
Supplies You’ll Need:
Watercolor Paper: 140 lb (300 gsm) paper is best.
Paints: 3 transparent watercolor paints. I used Permanent Rose, Sap Green, and Burnt Sienna. (Feel free to swap the Sienna for Quinacridone Gold or Gamboge).
Sketching Tools: A 2B pencil and a kneaded eraser.
Tape: Gentle tape (like masking or painter’s tape) that won’t tear your paper.
Board: A sturdy board to tape your paper onto.
Brushes: A few round brushes, plus a flat brush for the first layer (wash).
Extras: Salt and a hair dryer (optional, just to speed things up).
Step by Step
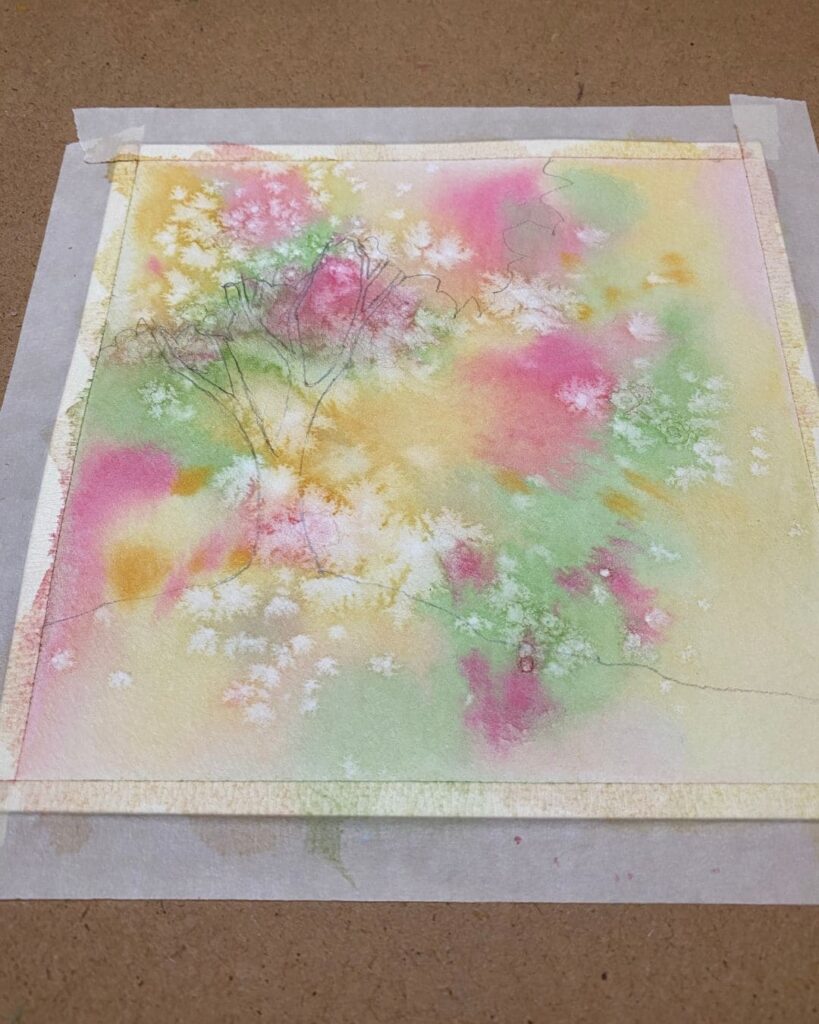
Step 1: The Background Wash
Prep: Tape your watercolor paper to a board. This prevents the paper from warping when it gets wet and gives you a nice clean border. (I used a 6-inch square for this).
Mix: Mix your three paint colors. They should be thin and watery, similar to coffee.
Wet the Paper: Use a flat brush to wet the entire page with clean water.
Add Color: Drop in your colors while the paper is wet. Try to make random shapes of different sizes—some big, some small. Avoid making a pattern of simple dots. Let the colors touch and blend naturally, but don’t overmix them. You can even tilt the board to help the paint flow.
Add Texture: Splatter a little paint on top for extra detail. While the paper is still damp and shiny (but not swimming in puddles), sprinkle on some salt. Let it dry completely to see the cool texture appear!”

Once completely dry, brush off the salt.
Step 2: Sketch the First Tree
Go Freehand: Since these trees are meant to look fun and wonky (not realistic), you don’t need stencils or rulers. Just sketch freely!
Wait Until Dry: Make sure your background paint is completely dry before you start drawing. This makes it much easier to erase mistakes.
Find the Best Spot: Before you draw, spin your paper around. Look at the textures and colors you created in Step 1 and decide which direction looks best.
Save the Best Parts: Try to draw your tree over the prettiest sections of the background wash so those colors end up inside the tree shape.
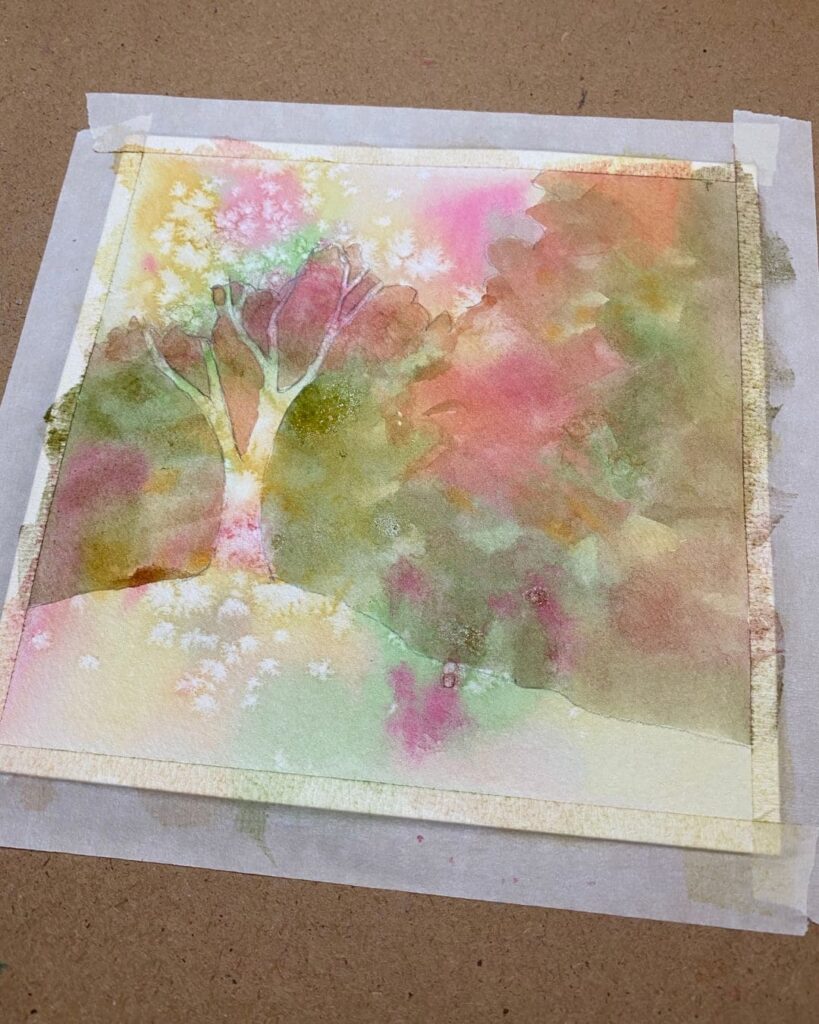
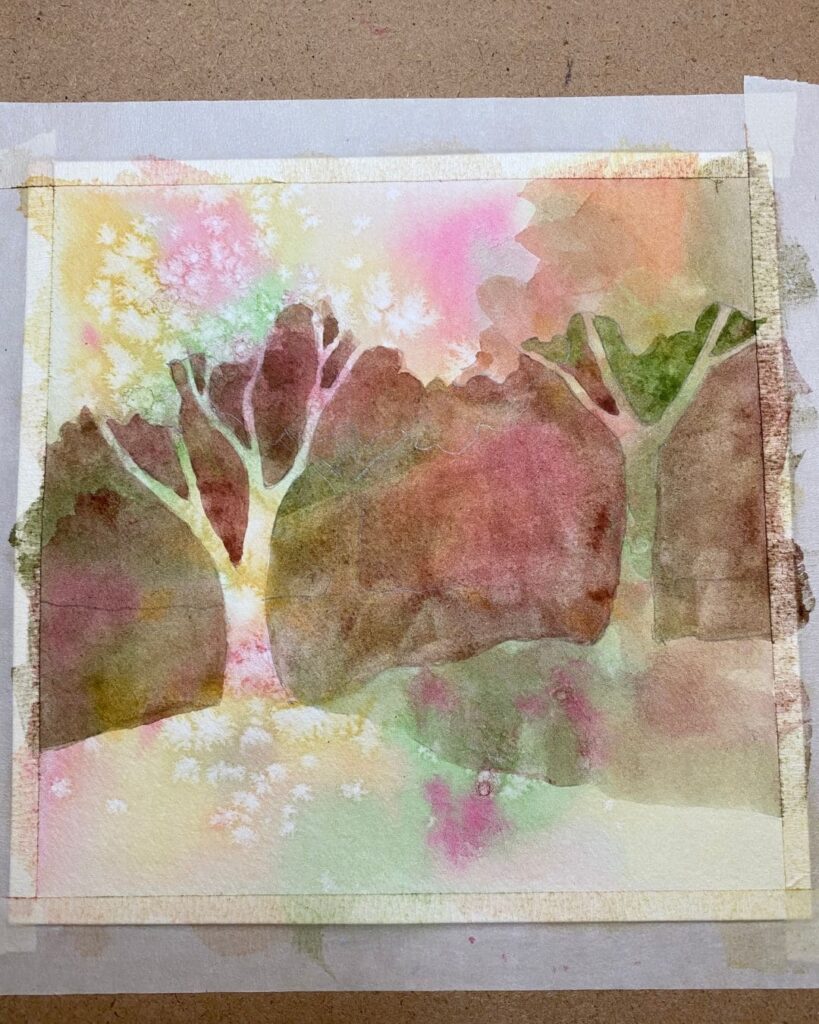
Painting Around the Tree
Draw the Outline: Draw your tree, including the branches, leaves, and the ground. Think of this tree as your ‘safe zone’—we want to keep it just the way it is.
Paint the Background (Negative Space): Now, paint everything outside and around the tree (including the gaps between branches). We are adding a second layer of thin paint here. This is called ‘glazing.’
Why Do This? Each new layer makes the background darker, which pushes it back and helps the tree stand out. Because watercolor is transparent, the new colors will layer over the old ones to create beautiful, deep tones.
Color Mixing: Colors that are slightly duller look further away. So, mix your original colors together:
- Mix Rose + Burnt Sienna to make orange.
- Add a tiny bit of Rose to your Green.
- Mix Green with a bit of Orange.
How to Paint:
- Be Gentle: Use a soft round brush (I used a #10) and paint quickly. Don’t scrub back and forth, or you might accidentally wash away the first layer.
- Blend freely: Dip your brush into different color mixes as you paint to vary the look. You don’t even need to wash your brush between dips!”
Let it Dry: Wait for the paper to dry completely, or use a hair dryer to speed it up.
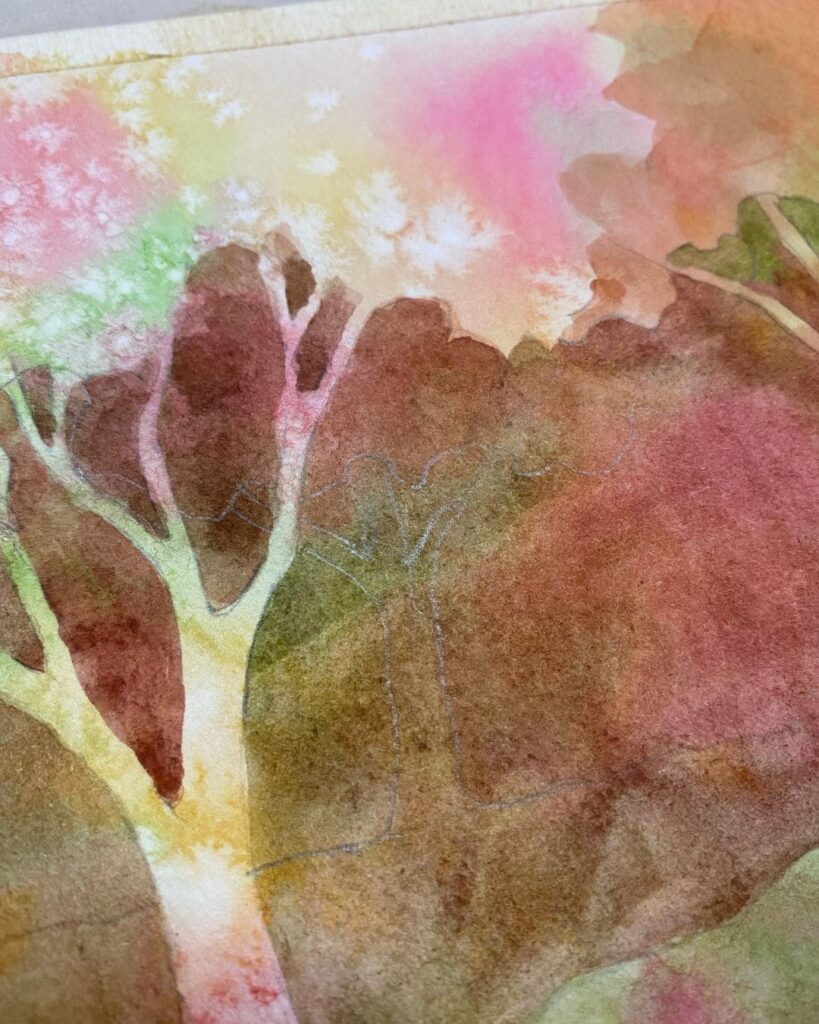
Step 3: The Middle Ground
Draw: Sketch a second, smaller tree and a hill. This will sit behind your first tree to create depth (the ‘middle ground’).
Paint: Now, paint the background again. This time, you need to paint around both the first tree and the new tree.
Colors: Start with a duller, ‘toned-down’ green.
- Stay Cool: Use cooler colors for this layer (more greens/blues, less orange). This helps push the background further away visually.
- Consistent Darkness: You can change the color slightly as you paint, but try to keep the darkness (value) the same throughout.

Refine the Details:
Switch Brushes: As you add more trees, the background space gets smaller and tighter. Switch to smaller round brushes (like size #6 or #8) to stay neat.
Build Depth: Mix your paint the same way you did in the previous step. Keep the layers transparent. This makes the background look darker and creates a deep, shadowy forest effect.
Step 4: The Final Tree
Draw: Sketch a third tree and hill. This layer will represent the furthest background distance.
Paint: Paint the final bits of negative space (the empty background) remaining around all three trees to finish the scene.
Mix up more paint, eliminating the orange. Using a variety of greens mixed as before, paint all but the three tree shapes.
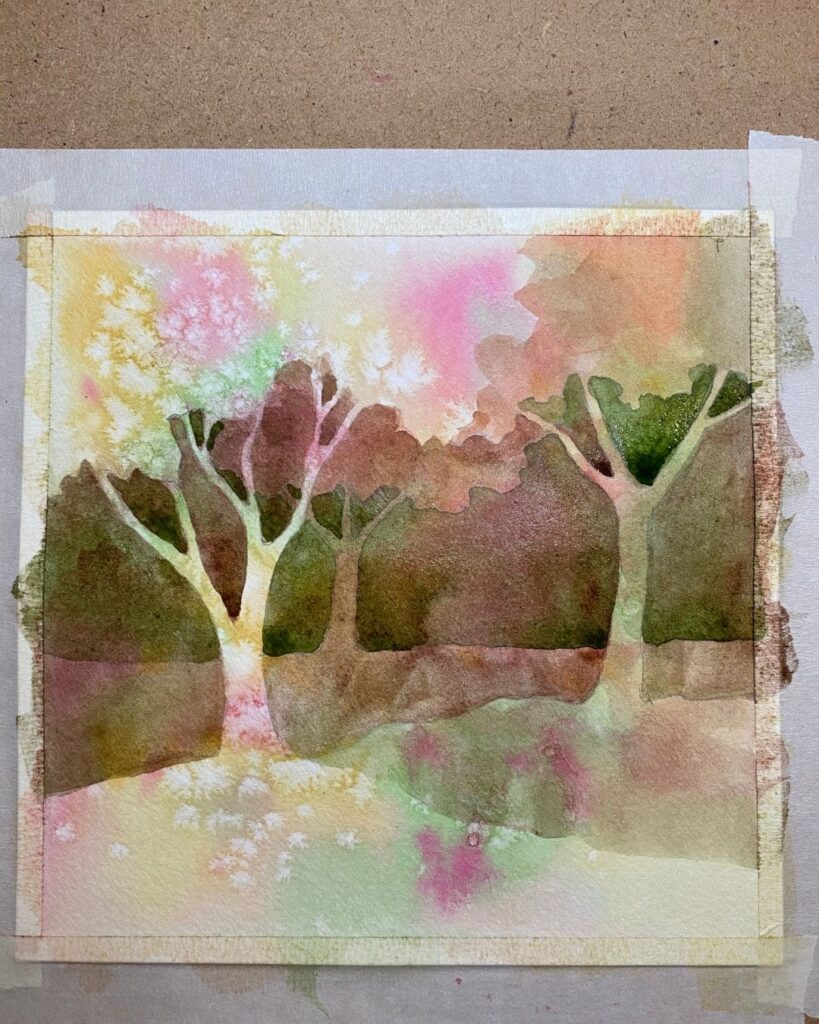
Let dry.
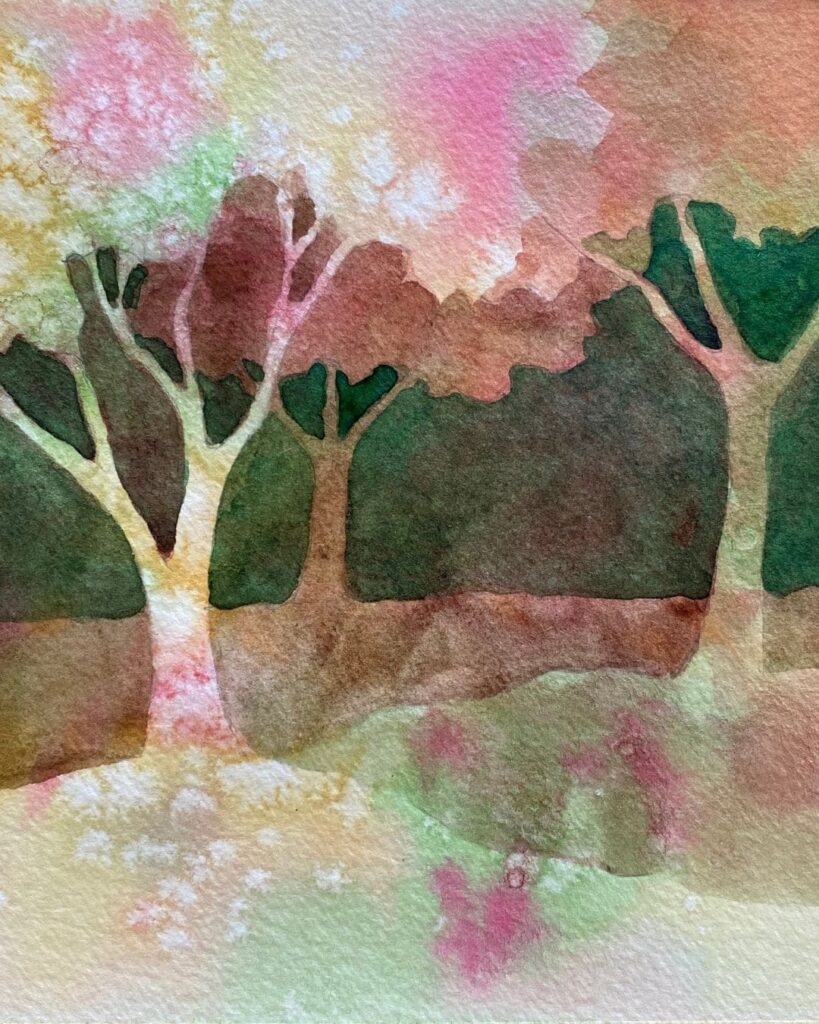
Step 5: Finishing Touches
Take a Look: Once your painting is dry, step back and see if it needs any adjustments. You might be happy with it just the way it is!
My Adjustment: In my example, I felt the background wasn’t dark enough to make the third tree stand out. To fix this, I added one final layer (glaze) of dark green to create a deep, shadowy look.
The Result: Notice the contrast? Because the background layers are cool and dull, they make the first tree look much warmer and brighter by comparison.
After it dries, you can use a kneaded eraser to remove visible pencil marks. Peel the tape off carefully, pulling away from the image to reveal a tidy edge and professional looking painting. Sign it!

Step 6: Share Your Work!
Thank you for joining me and giving this a try. I hope you enjoyed this project and learned something. I’d love to see what you’ve done!
Quick Tip: Try to use staining or transparent paints (check the label). These stick to the paper well and won’t lift off easily when you paint over them, making them perfect for this layering technique.
A Friendly Note: This tutorial is for your personal practice and learning only. Please do not use my design or these instructions for commercial products. If you enter art shows or contests, please make sure to use your own unique designs, rather than a copy of this sketch.
Ideas to Challenge Yourself:
Go Bigger & Bolder: Once you understand the steps, try a more complex scene. You can add more trees, bushes, or even animal silhouettes on each layer. Try a larger sheet of paper or switch up the colors to create different moods (like a spooky forest or a bright autumn day).
Add Details: You can also draw details inside your tree shapes for extra realism.
Using Negative Painting in Other Work:
Spot Corrections: You don’t have to use this technique on the whole background. You can use it in small areas to fix or define shapes.
Selective Focus: For example, if you are painting a bouquet and want to add a leaf, just paint the negative space around that leaf shape.
Soft Edges: Instead of painting the whole background like we did here, just paint around the object and then use a damp brush to fade the paint edges smoothly into the rest of the background. This is great for separating overlapping objects or making one specific edge stand out.
Support My Work: If you enjoyed this tutorial and want to help me create more free content, you can ‘buy me a coffee.’ Any donation helps make art education accessible to everyone. [Donate here]. Thank you so much!
Happy Painting!
To see more of my work or purchase prints, please view my shop page.