
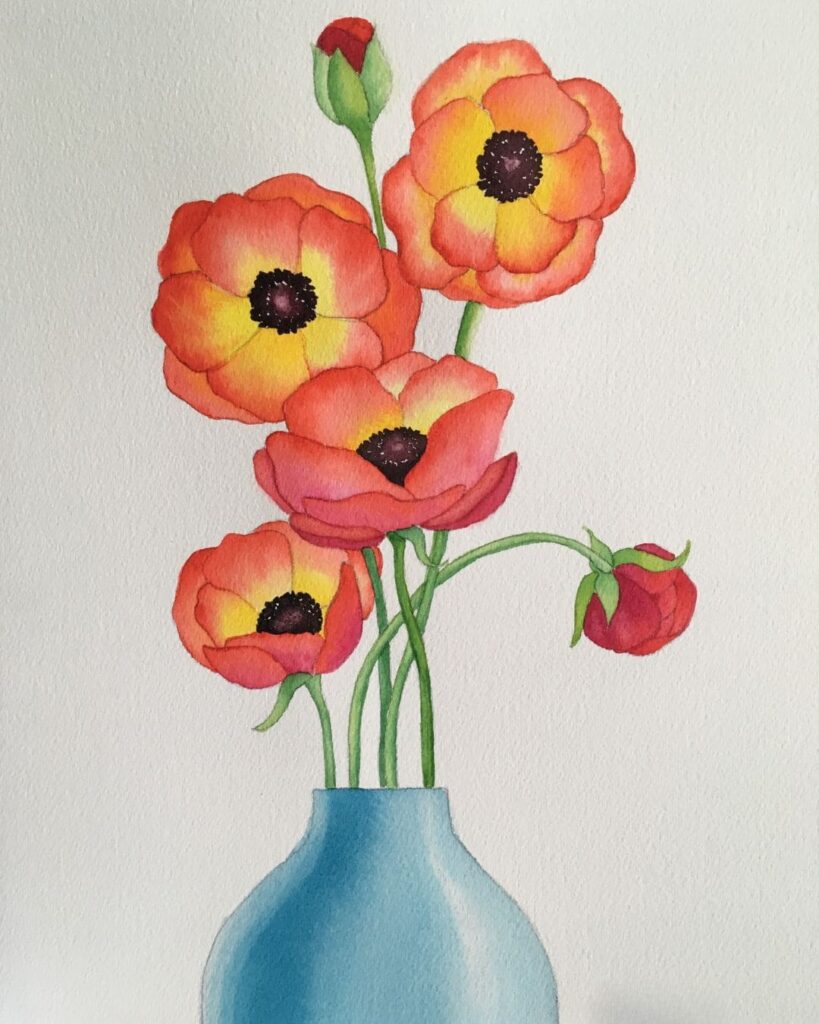
In this tutorial, we’re going to paint a vase of beautiful, two-toned Ranunculus flowers. We will focus on creating soft, dreamy petals using the ‘wet-in-wet’ technique.
You’ll also learn how to mix a wide variety of colors (including a rich black) using just a few basic paints. This project is perfect for practicing how to control your edges and blend colors smoothly while the paper is wet.
I’ve included everything you need below: a supply list, step-by-step instructions with photos, and a line drawing you can trace to get started!
This is a perfect project for beginners. You get plenty of practice painting the petals, and you don’t have to worry about a complicated background.
The real charm of this painting comes from the random textures in the petals. So, just relax! Try not to overwork the paint—let the watercolor do its own magic. It almost always looks different once it dries, but those little surprises are part of the fun!
Supplies
Paper: One 9″x12″ sheet of watercolor paper. (I recommend Arches 140 lb Cold Press).
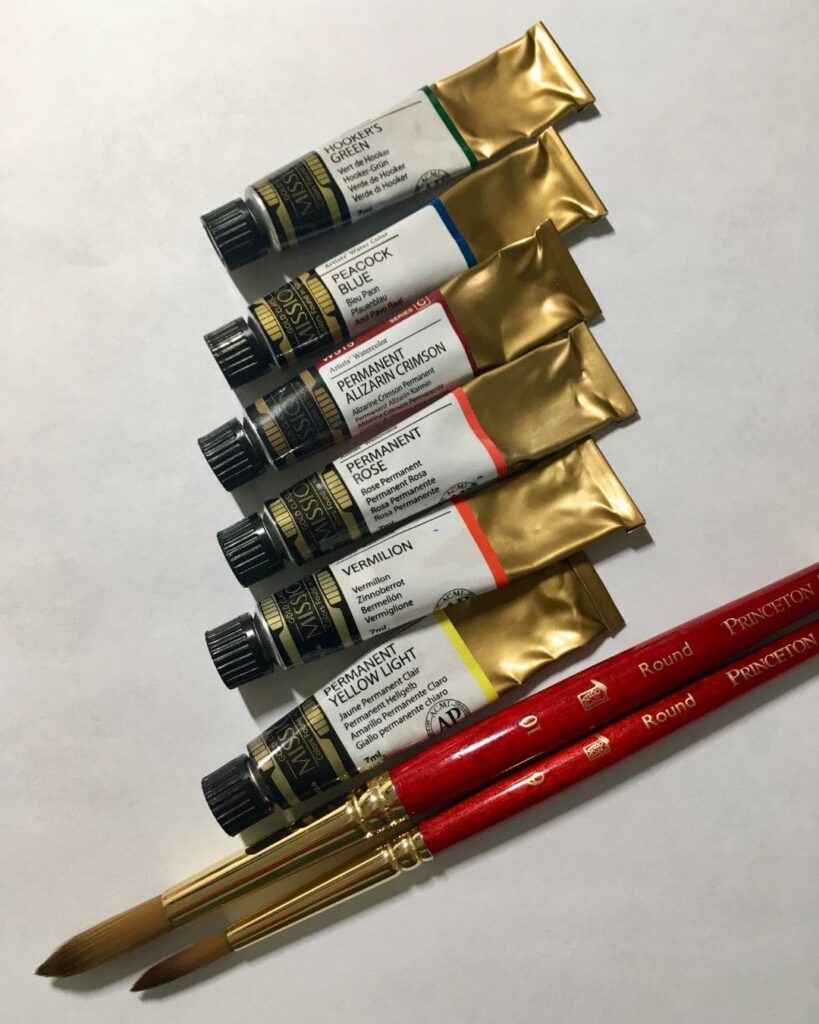
Brushes: Two round brushes, sizes #6 and #10.
Note: I use Princeton Art & Co. (Series 4050R), but any synthetic watercolor brush will work. If you don’t have these exact sizes, a size larger or smaller is perfectly fine.
Paints: I used Mijello Mission Gold, but you can substitute with similar colors you already have in your palette.
- Yellow: Permanent Yellow Light (Alternate: Lemon Yellow or Hansa).
- Red/Orange: Vermillion (Alternate: Scarlet Lake or a warm red).
- Dark Red: Permanent Alizarin Crimson (Alternate: Quinacridone Magenta).
- Blue: Peacock Blue (Alternate: Cobalt, Turquoise, or Teal).
- Green: Hooker’s Green (Alternate: Sap Green).
- (Optional): Permanent Rose (Alternate: Quinacridone Rose or Permanent Carmine).
Sketching Tools: Pencil and a kneaded eraser.
Tracing: Wax-free graphite paper (to transfer the design) OR a light box/sunny window.
Basics: A jar of clean water, paper towels (or a rag), and a palette for mixing.
Tape: Masking or painter’s tape (optional).
Step By Step
Step 1: The Sketch
Get the Design: First, print out the line drawing provided below. (Feel free to resize it to fit your paper).
Trace It: Transfer the design onto your watercolor paper. You can do this by:
- Taping the sketch and your paper to a bright window or light box.
- Using graphite transfer paper.
Helpful Tips:
Keep it Light: Press gently with your pencil. You want the lines to be just visible enough to see, but light enough that they won’t show through your finished painting.
Taping Down: Usually, I recommend taping your paper to a board to keep it flat. However, since we aren’t using a ton of water for this project, taping is optional. If your paper gets a little wavy, you can always flatten it after it dries!
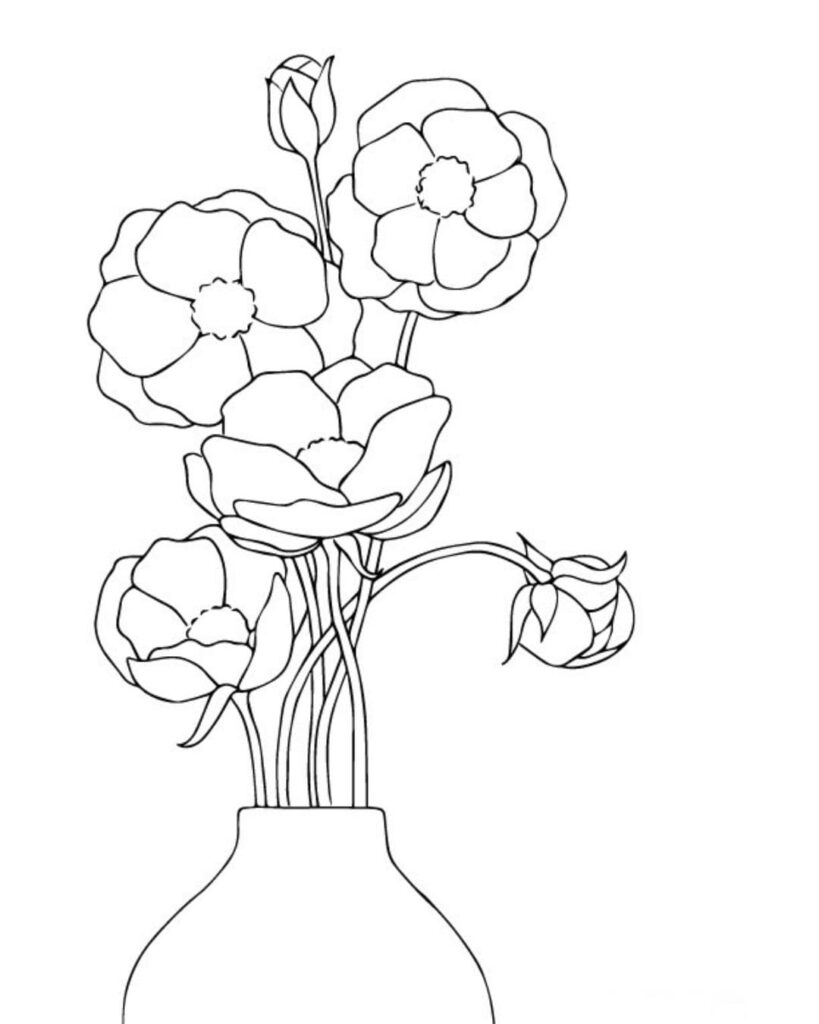
Download PDF: Ranunculus line drawing
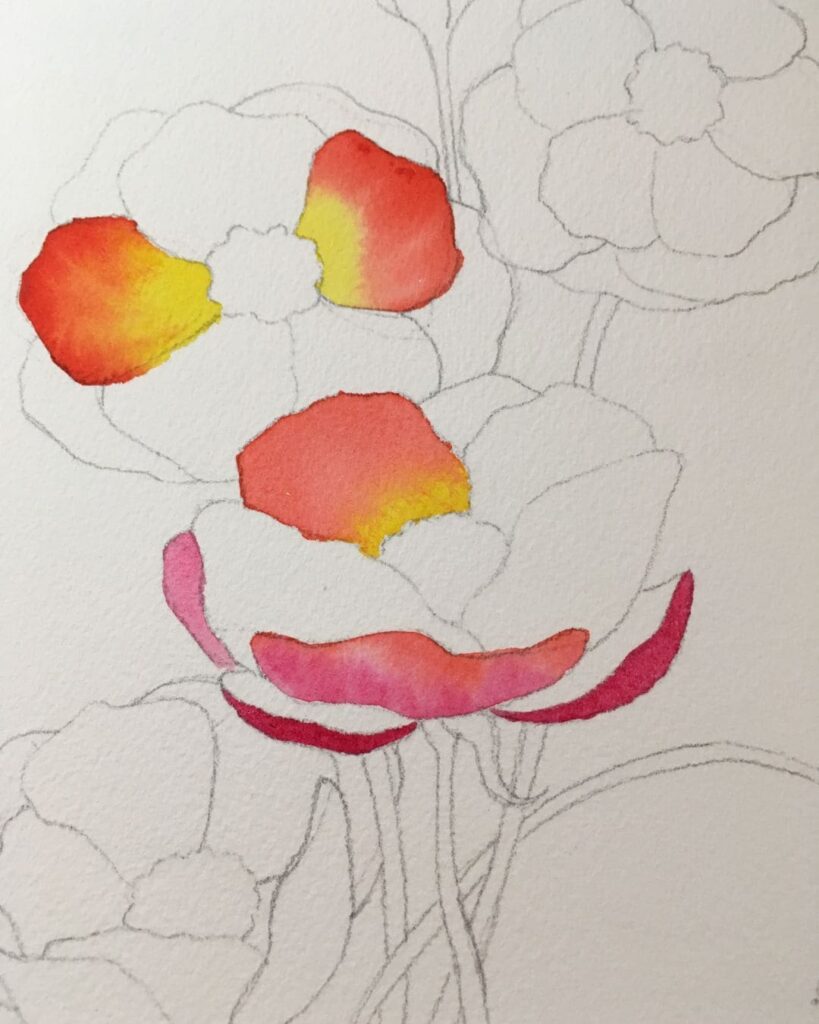
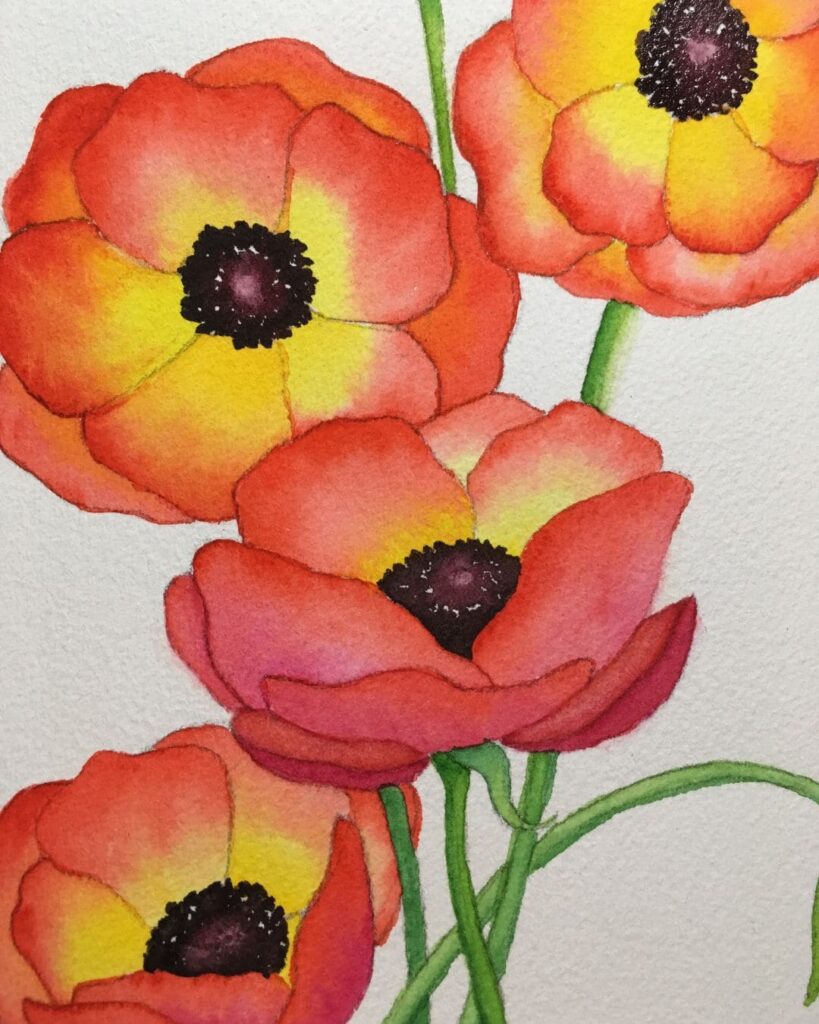
Step 2: Painting the Petals
Quick Tip: If your paints are dry and hard in the pan, give them a quick spray of water to soften them up before you start.
The Technique: We are going to use the ‘wet-in-wet’ method, painting just one petal at a time.
Prep: Use your #10 brush. Mix puddles of your red and yellow paints on your palette. Aim for a consistency like whole milk—this ensures the colors are bright and vibrant.
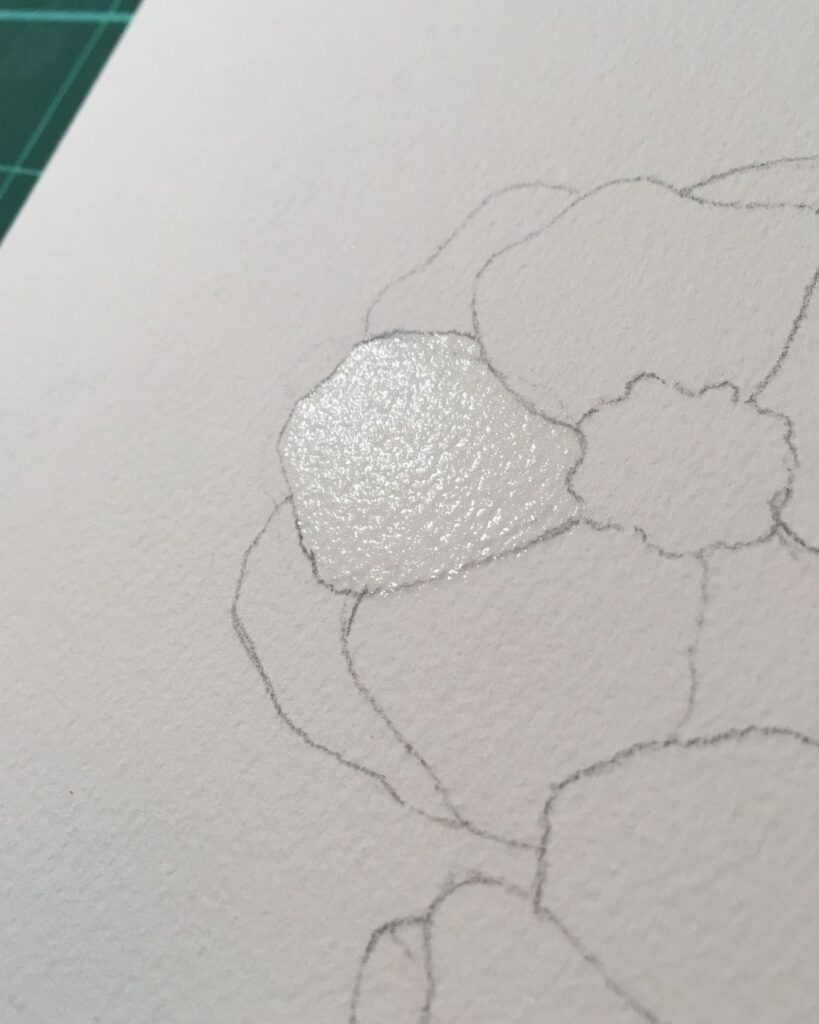
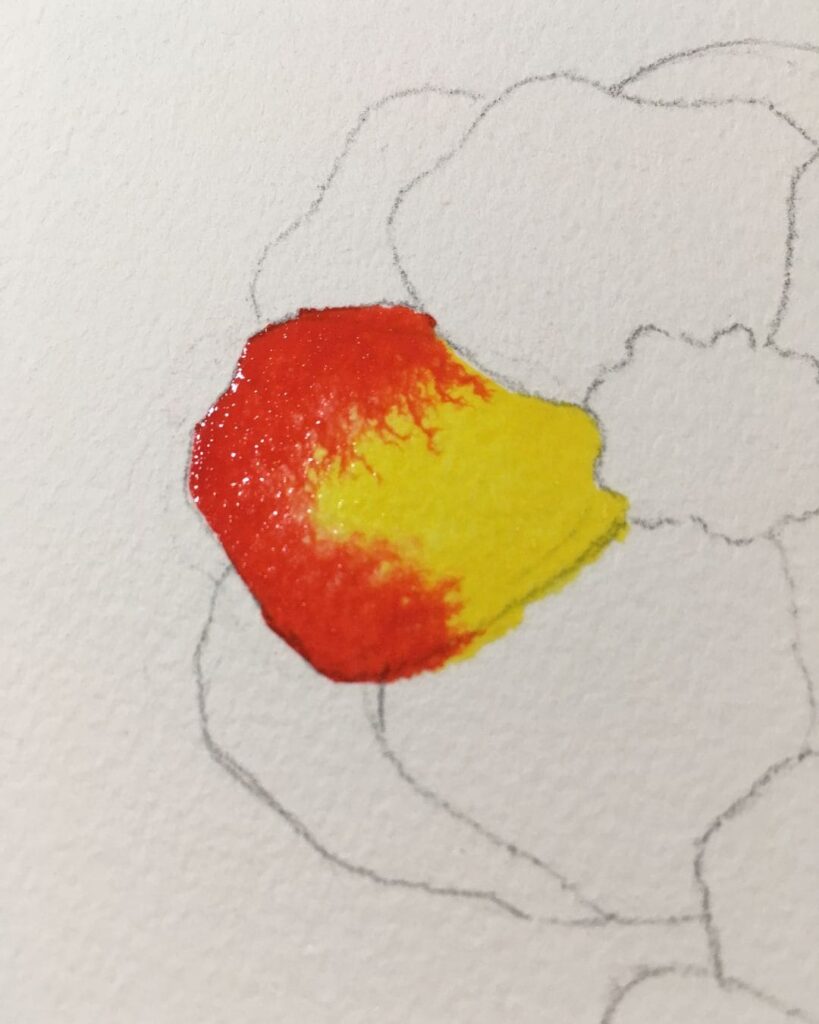
Wet the Paper: Pick one petal and paint it with clean water. You want the paper evenly wet, but not swimming. If you see a big ‘dome’ or puddle of water sitting on top, it’s too wet.
Watch the Shine: The paper needs to be glossy so the paint can flow and blend.
The Golden Rule: Once the paper loses its shine and starts to look dull (matte), STOP.
- Do not touch it! If you keep painting while it’s damp, you will create streaks or blotches.
- If you aren’t happy with it, just let it dry completely. You can always add a second layer later.
Add the yellow into the petal area nearest the center. The paint will flow into the wet area but not beyond it.

Adding the Red: Next, drop some Vermillion paint along the outer edge of the wet petal. Let it flow naturally inward toward the yellow section. If the two colors aren’t touching, just add a little more paint to help them meet and blend.
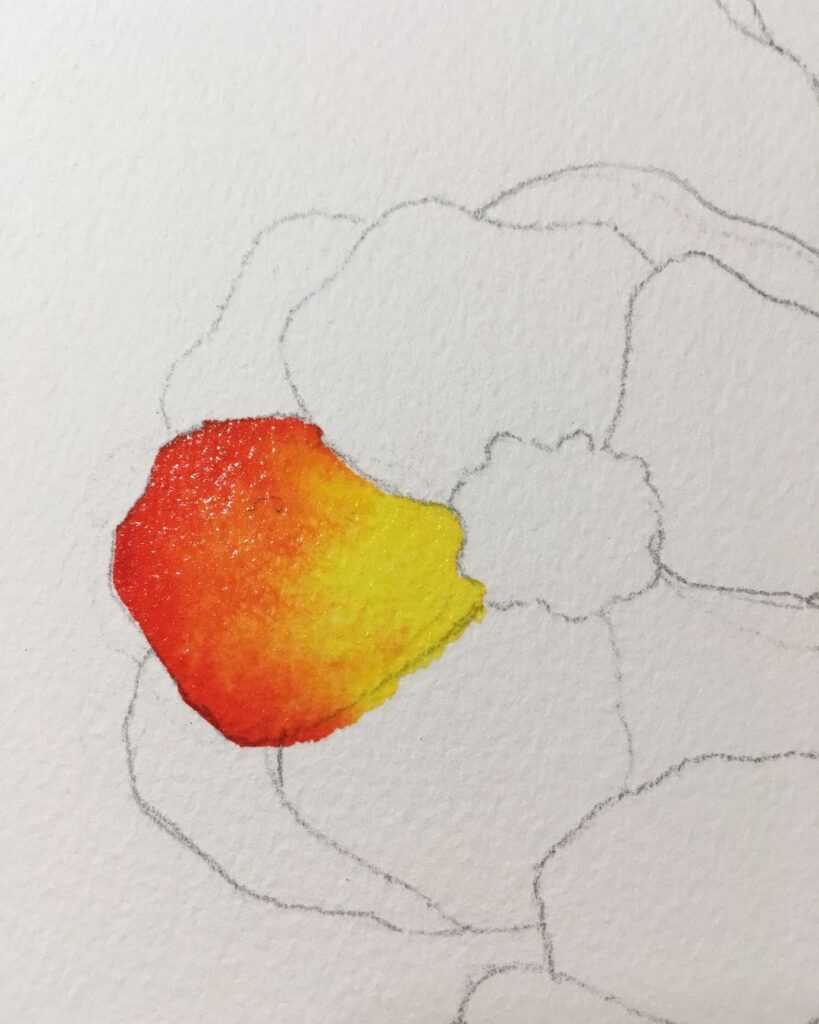
How to Blend:
Tilt It: Tilt your paper back and forth. Let gravity help the colors flow into each other naturally.
Use Your Brush: If the paint isn’t moving enough, you can help it along with your brush.
- Technique: Gently drag the lighter color into the darker color.
- Keep it Clean: Wipe your brush off between strokes to keep the colors fresh.
- Soft Touch: Just ‘tickle’ the area where the two colors meet. You want a soft, smooth fade, not a hard line.
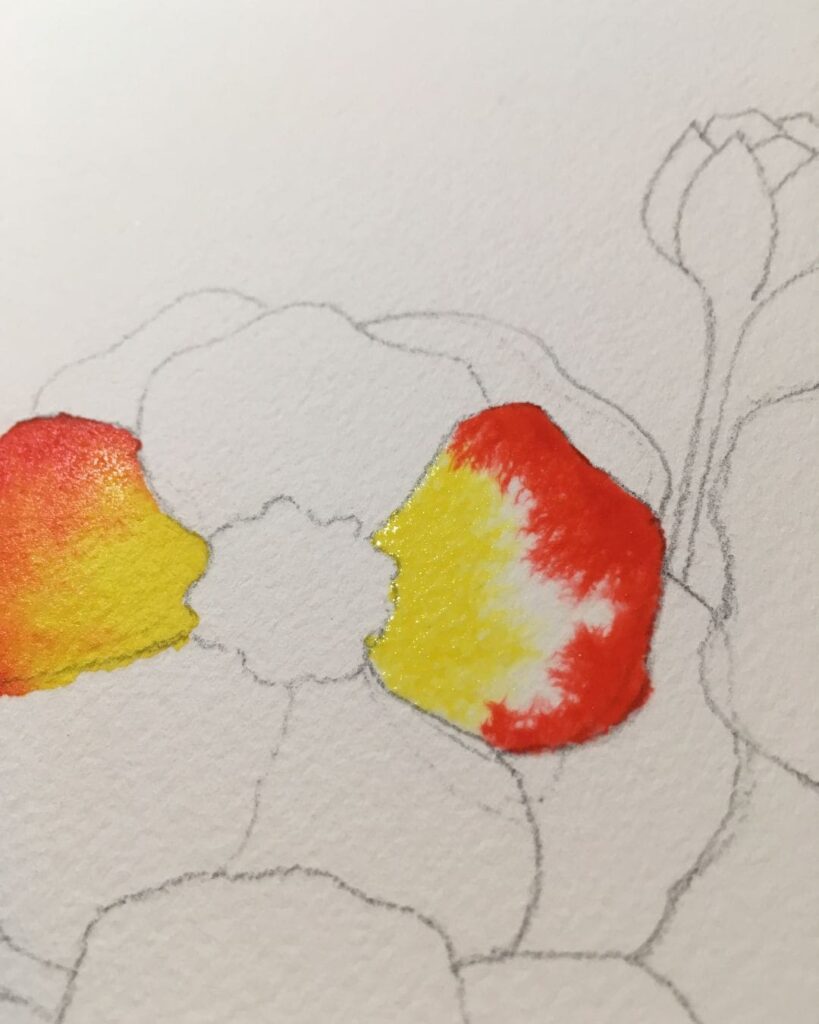
Repeat & Skip Around:
Move On: Do the same thing for the next petal.
Important Rule: Make sure you skip around. Never paint a petal that is right next to a wet one!
Why? If two wet petals touch, the colors will bleed across the line and ruin your crisp edges. Pick a petal on the other side of the flower instead.
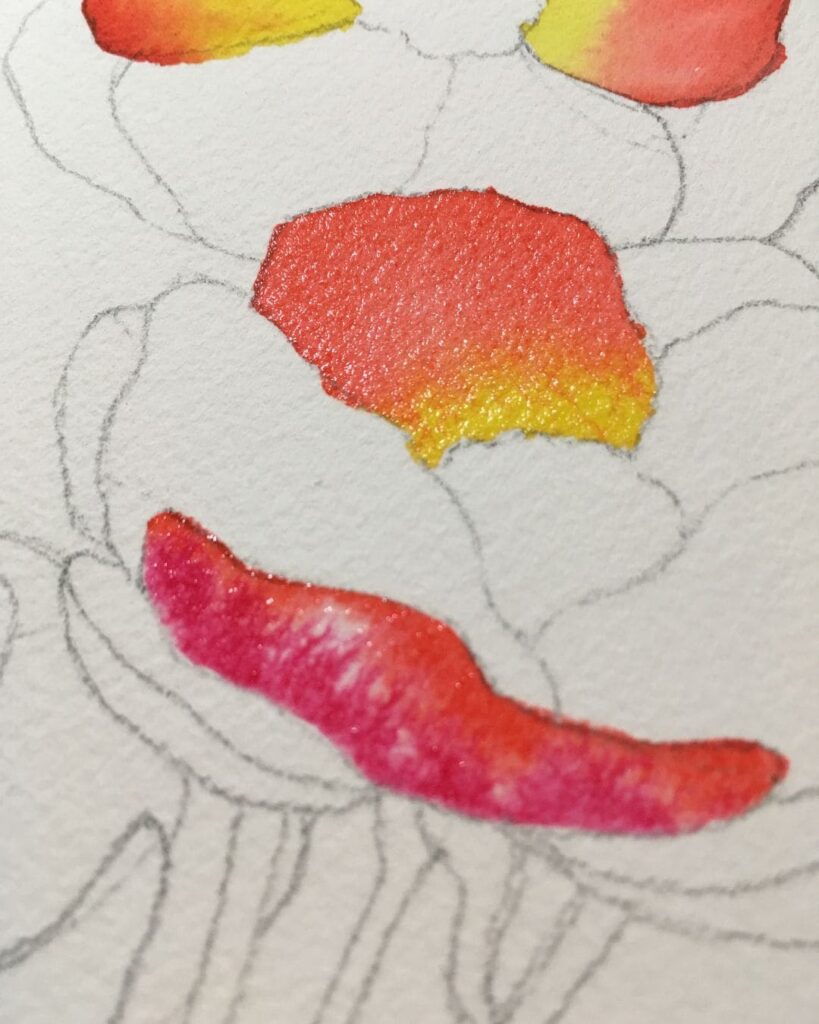
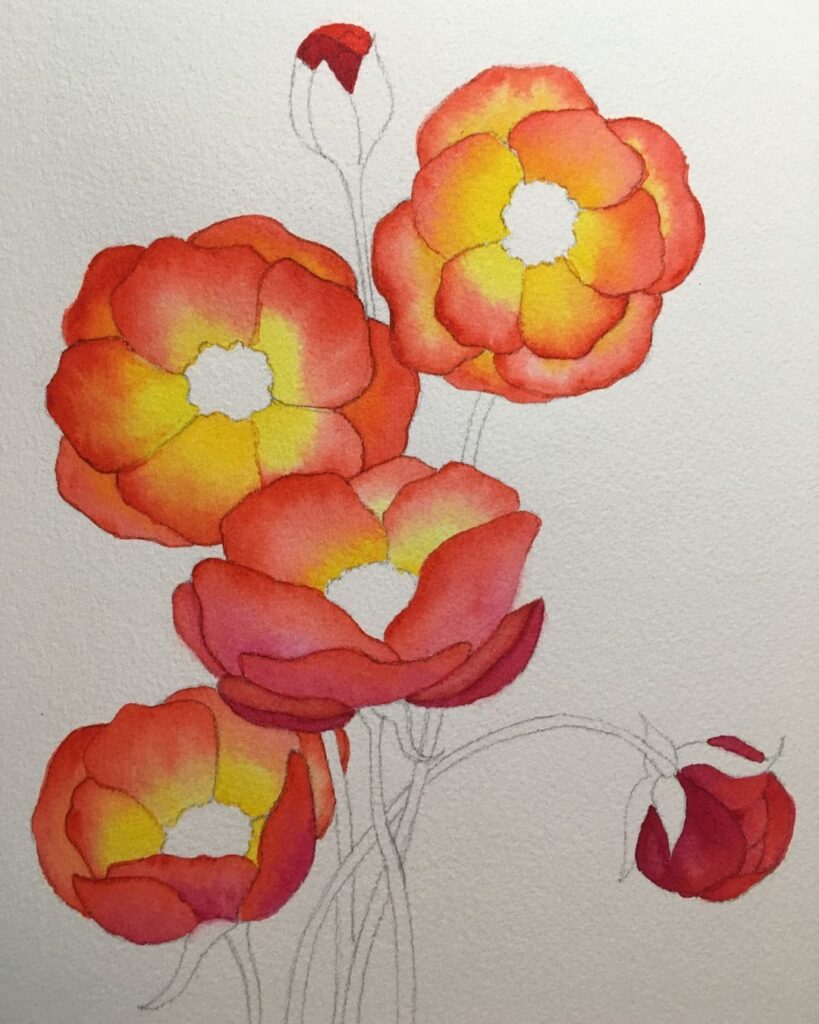
Adding Depth: To make the flowers look more 3D and interesting, try adding a touch of Permanent Rose to some of the petals.
Focus on the shadow areas—like the bottom of a petal, or the edge where one petal is tucked underneath another. This darker color helps create that shadowed look.
Keep Going: Continue painting the petals around the flower.
Work Smart: If you are right-handed, try working from left to right (or top to bottom). This keeps your hand from accidentally smudging the wet paint.
Timing: By the time you finish one section, the first petals you painted should be dry. This allows you to safely go back and paint the gaps in between them without colors bleeding.
Add Alizarin Crimson or the coolest red to deepen some petals.
Quick Tip: Remember, watercolor always looks lighter once it dries. Some colors might even look a bit duller than you expect. This is totally normal! If it looks too pale, you can always add another layer later. I recommend waiting until you finish the whole painting to decide which parts need touching up.
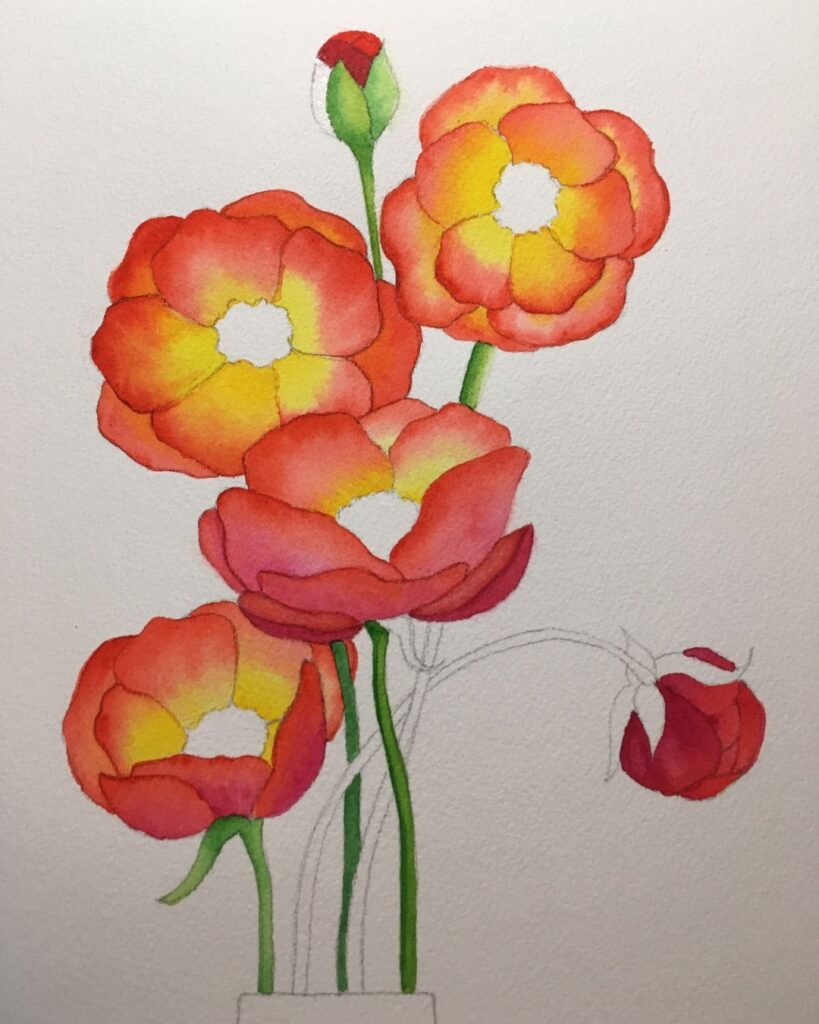
Step 3: Stems, Buds, and Greenery
Mix Your Greens: Start with your Hooker’s Green and mix up a few variations on your palette:
- Strong: Mostly paint, very little water.
- Light: Add more water.
- Warm: Mix in some yellow.
- Cool/Dark: Mix in some blue.
How to Paint: Use your smaller brush (#6). Just like the petals, wet the stem or bud with clear water first. Then, touch your brush to the wet paper to drop in the green paint.
Add Depth: Don’t just use one color! While the paint is wet:
- Add Warm Green (Yellowish) to areas where the light would hit.
- Add Cool Green (Blueish) to shadow areas—like the bottom of a bud, or where one stem crosses underneath another.
Make it Round: To stop the stems from looking flat, try to make one side of the stem darker than the other. This creates a shadow effect and makes the stem look round and 3D.
Continue working on the green areas until complete, remembering to allow sections to dry before painting directly beside it.

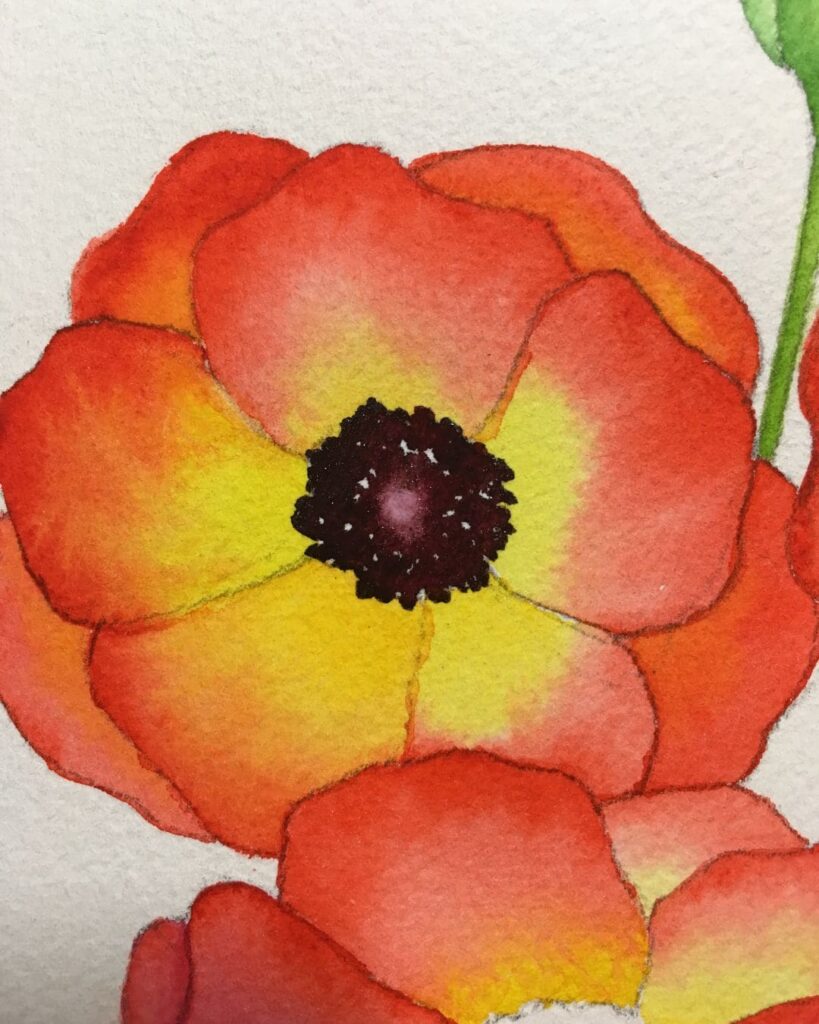
Step 4: The Flower Centers
Mix a ‘Black’: You don’t need a tube of black paint! Mix your Hooker’s Green and Alizarin Crimson (Red) together to create a deep, dark, almost-black color.
Add Texture: Use the tip of your #6 brush to dab small dots into the center of the flower. Apply this directly to dry paper (don’t wet it first).
Leave Sparkles: Don’t paint a solid black blob. Make the edges bumpy and leave tiny specks of white paper showing between the dots. This texture makes it look like a real flower center.
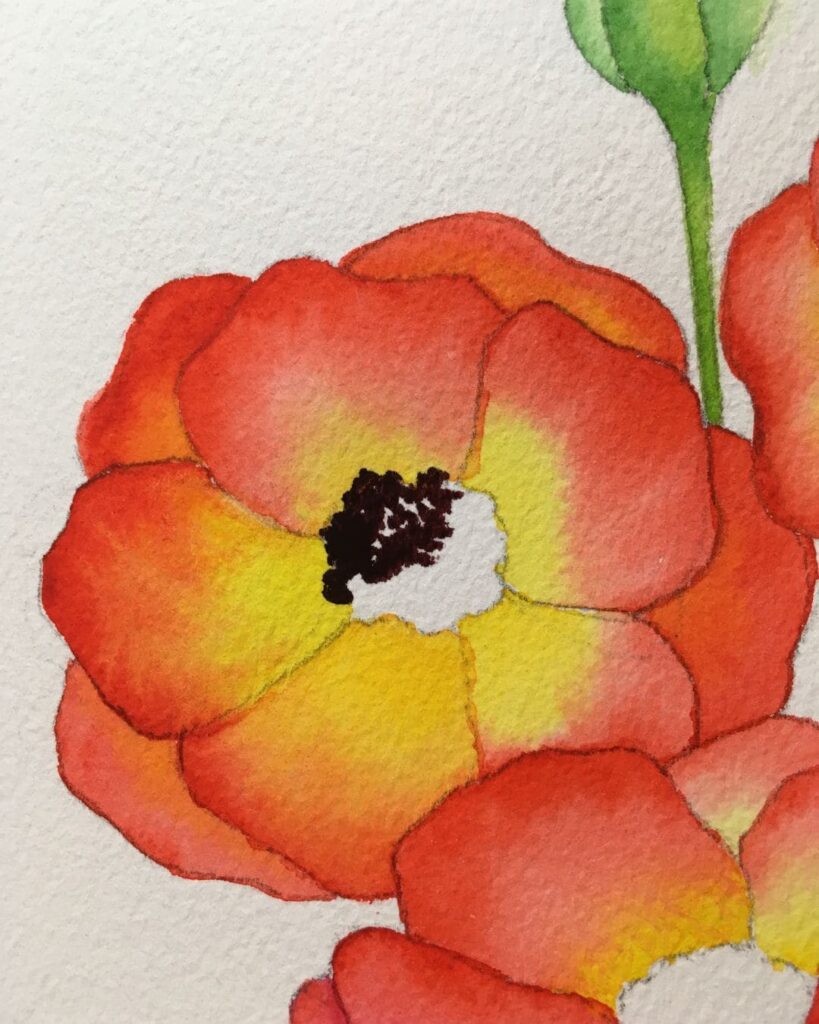
Refine the Center:
Warm it Up: Add a little more red to your dark mix to create a ‘warmer’ black color. Dab this right into the middle of the area you just painted.
Add a Highlight: While the paint is still wet, you need to remove a tiny dot of color from the very center to create a bright spot (highlight).
How to Lift Color: You can do this easily with a Q-tip (cotton swab). Or, wrap a tissue around the end of your brush handle and gently blot the paper to soak up the paint.
Repeat for each center.
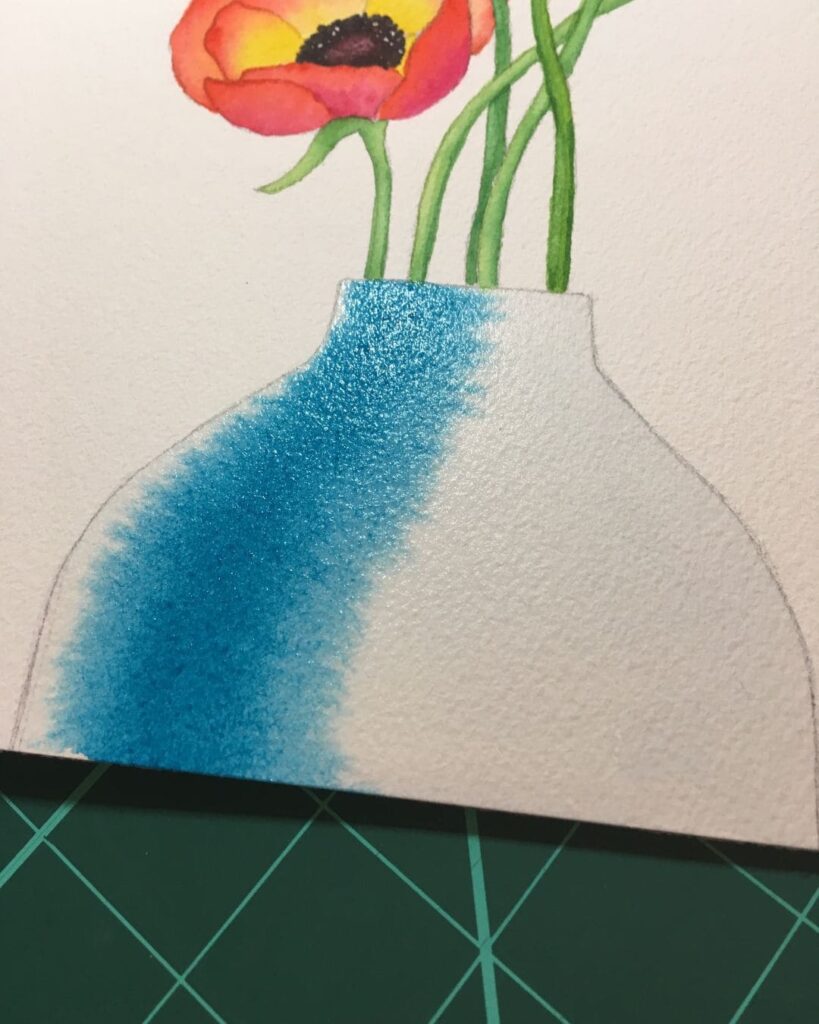
Step 5: The Vase
Wet on Wet: Using your #10 brush, wet the entire vase shape with clear water.
Add Color: You need to work quickly while the paper is still wet! Swipe a strong mix of your Blue paint near the left side of the vase.
The Highlight: Try to leave a thin white strip (a ‘sliver’) on the very far left edge. This makes the vase look shiny, like glass.
Fixing Mistakes (The ‘Thirsty Brush’): If the blue paint spreads too far and covers your white highlight, don’t panic! You can fix it with a ‘thirsty brush.’
- How to do it: Rinse your brush and wipe it on a paper towel so it is just barely damp (not dripping).
- Lift: Gently drag this damp brush over the area to soak up or ‘lift’ the extra paint.
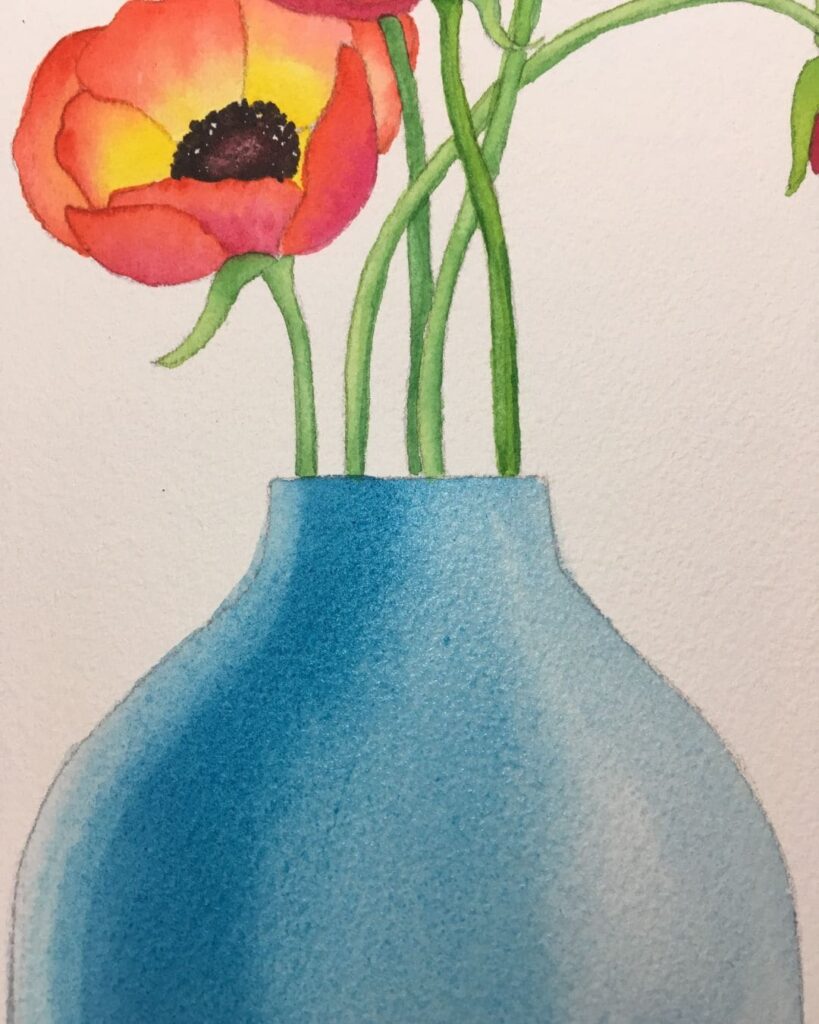
Finish the Vase:
Fill it In: Use a lighter, more watery mix of blue to paint the rest of the vase, going all the way to the right edge.
Add a Reflection: While the paint is still wet, grab your damp ‘thirsty brush’ again. Gently wipe a vertical strip on the right side of the vase to lift the color off. This creates a soft, realistic reflection on the glass.
Step 6: Finishing Touches
Don’t Overdo It: At this stage, less is definitely more! It is very easy to mess up the fresh look of the painting if you fiddle with it too much.
Check Your Work: Step back and look at the whole picture. Are there any weird edges that need fixing?
Define Shapes: If some petals or stems look like they are blending into each other, you can add a second layer of paint to separate them. Important: Make sure the first layer is bone dry before you do this!
Add Highlights: If an area looks too dark, you can gently scrub it with a clean, damp brush to lift some color off.
Clean Up: Once the painting is completely dry, use your kneaded eraser to remove any visible pencil lines.
Remove Tape: If you taped your paper down, wait until it is dry and then peel the tape off carefully.

Step 7: Share Your Work!
Thanks for joining in: Thank you so much for painting along with me! I hope you had fun and learned something new. I would absolutely love to see your finished piece.
A Friendly Reminder: This tutorial is for your personal practice only.
- Please do not use this design or these instructions to sell products.
- Please do not enter this painting into art shows or contests (since it is based on my original sketch).
What’s Next? Feeling inspired? Check out my next tutorial here.
Support Free Art Education: If you enjoyed this lesson and want to help me keep creating free content, you can ‘buy me a coffee.’ Pay whatever you are comfortable with—every little bit helps make art accessible to everyone. [Donate here].
Thank you so much!