
This beginner-friendly project is super versatile. To me, it looks like a colorful stained glass window or even a cozy patchwork quilt!
You can change the style completely by adding black outlines or using a white gel pen to draw little ‘stitches.’ It is a great way to practice mixing colors and controlling your brush.
Make it your own:
Switch Supplies: You can use this design as a coloring page with crayons, markers, or colored pencils.
Get Creative: Add ink doodles, try different color themes, or even cut it up to make a puzzle.
Just relax and let your imagination run wild!
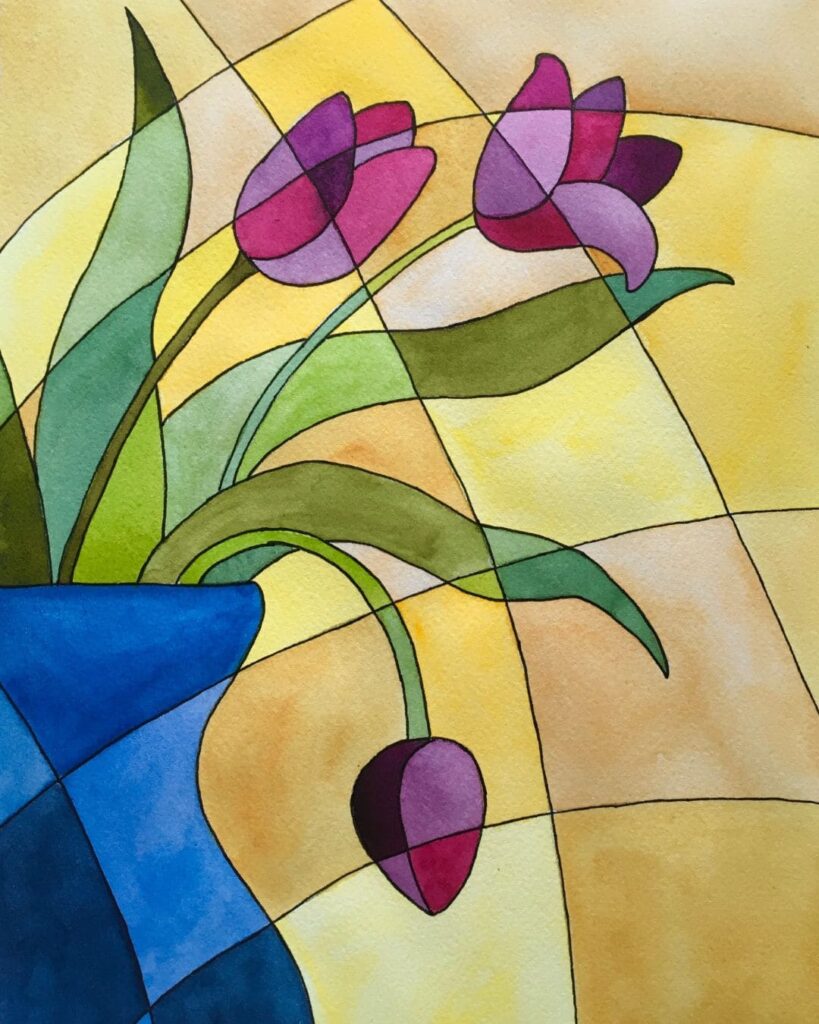
I’ve broken the design process down into two easy steps so you can clearly see the shapes before you start painting.
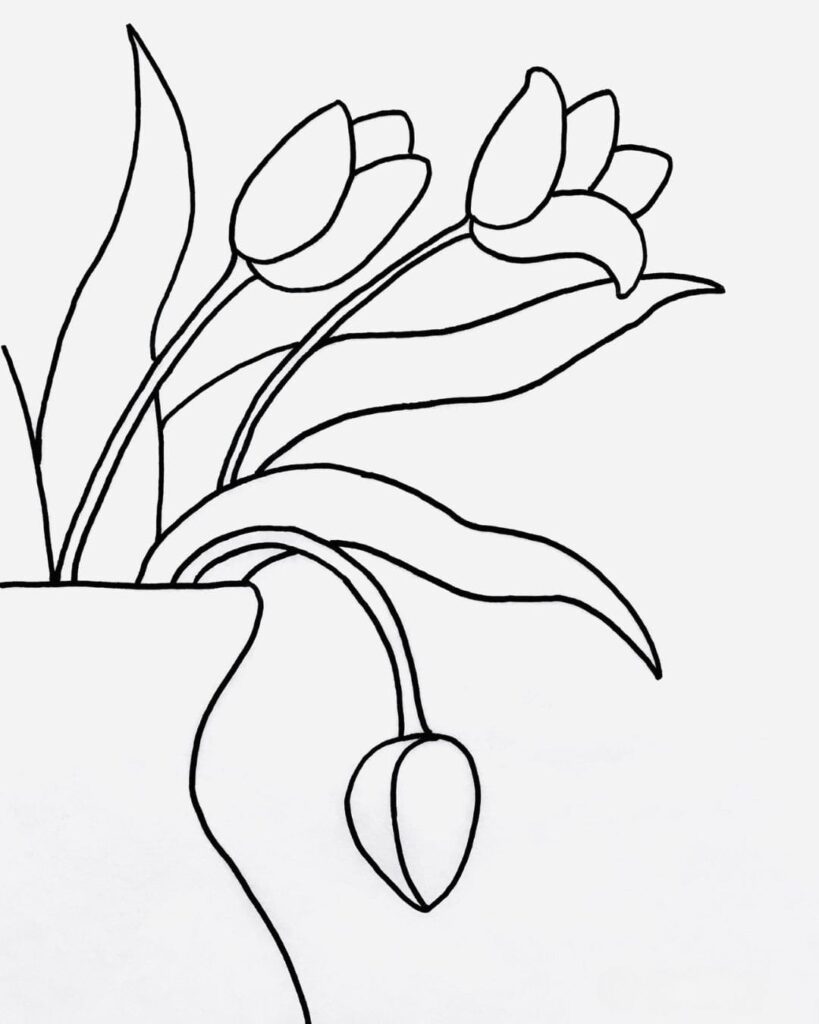
Step 1: Create Your Design
Draw a simple sketch using a variety of shapes. Here are a few tips to make your composition look professional:
Mix up the Sizes: Use a combination of small, medium, and large shapes to keep things interesting.
The Rule of Odds: Try to use odd numbers of objects (like 3 or 5 flowers). This usually looks more natural than even numbers.
Flower Variety: Instead of drawing every flower exactly the same, mix it up! Draw a bud, a half-open flower, and a fully open bloom. This gives you different shapes and sizes to work with.
Change the Angles: Draw your stems and leaves pointing in different directions.
The Vase: Draw any vase shape you like.
Go Off the Edge: Imagine your scene is bigger than the paper. Let some flowers or leaves run off the edge of the page. This breaks up the background and makes the empty spaces look cool.
Feel free to experiment and draw your own design, or you can just use the patterns I’ve provided below!
Step 2: The Line Overlay
Break it Up: Now, draw lines across the entire page to break your design into smaller, abstract shapes (like a stained glass window).
Any Style Works: Your lines can be curvy, straight, diagonal, or look like a grid. It’s up to you!
Cut Through: Make sure your new lines cross right through your main objects (like the flowers and vase).
My Example: I drew two curved lines from top to bottom, cutting right through the tulips. Then, I added four more curved lines going across the page.
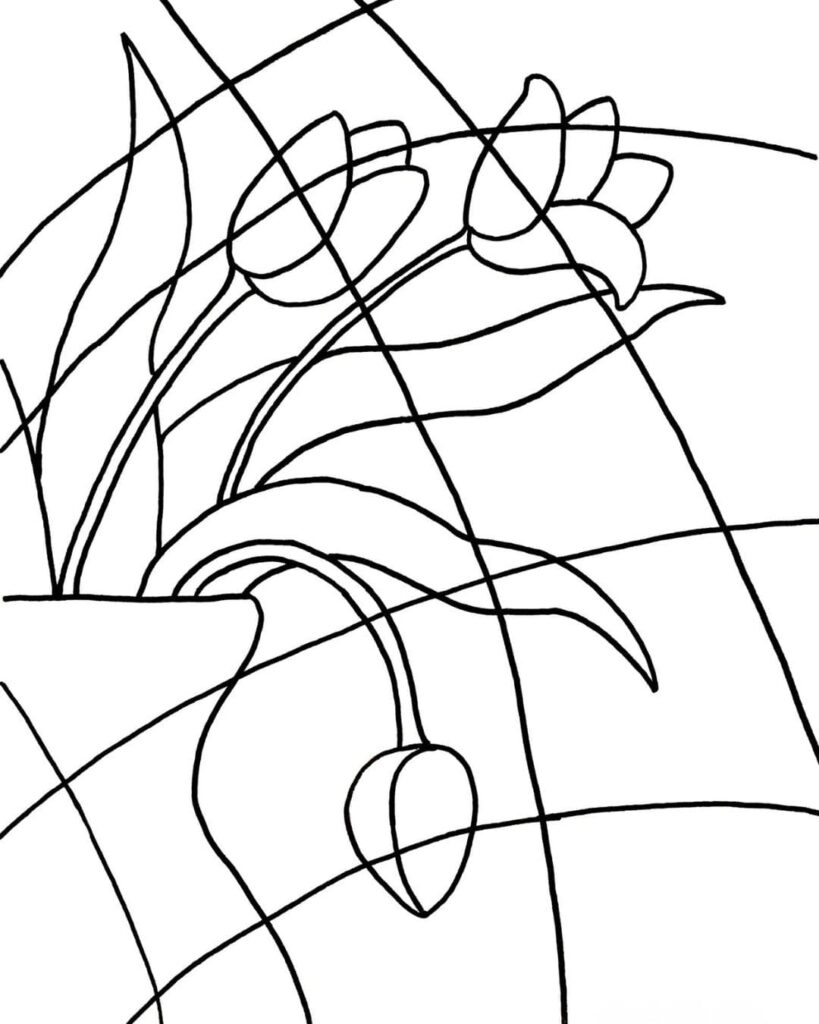
Step 3: Transfer Your Design
Transfer: Copy your design onto your watercolor paper. (If you need a refresher on how to do this, check out Step 1 in Tutorial #1).
Step 4: Choose Colors & Paint
Pick Your Palette: I recommend choosing just 4 main colors:
- One for the flowers.
- One for the leaves.
- One for the vase.
- One for the background.
Paint by Shape: Paint each little ‘stained glass’ shape individually with a solid color.
Mix it Up: Even though you are using one main color for an object (like the flowers), you don’t want every single shape to look exactly the same. Try to vary the shade slightly for each piece. You can do this by:
- Changing the Temperature: Mix in a little bit of a neighboring color to make it warmer or cooler.
- Toning it Down: Mix in a tiny bit of the opposite color (complementary color) to make it less bright.
- Changing the Value: Add more water to make it lighter, or use less water to make it darker.
The Goal: You want the shapes to look distinct from each other, but you still want the whole flower (or vase) to look like it belongs together.
Step 5: The Finishing Touches
Outline It: If you want a bold look, you can trace over your pencil lines with an ink pen or paint marker.
Timing: You can do this at the very end, OR you can do it before you start painting (just make sure you use waterproof ink so it doesn’t smear!).
Have Fun: Feel free to add doodles, patterns, or even cut the painting up into a puzzle.
Helpful Tips:
Mix Ahead: Mix large puddles of paint on your palette before you start. This ensures you have enough color to paint several shapes without having to stop and re-mix.
Skip Around: Do not paint a shape that is next to a wet one! If you do, the colors will bleed across the line. Jump around to different parts of the paper to give areas time to dry.
Brushes: I used a round brush with a sharp point for detail. If you have large shapes with simple edges, a wide flat brush works great, too.
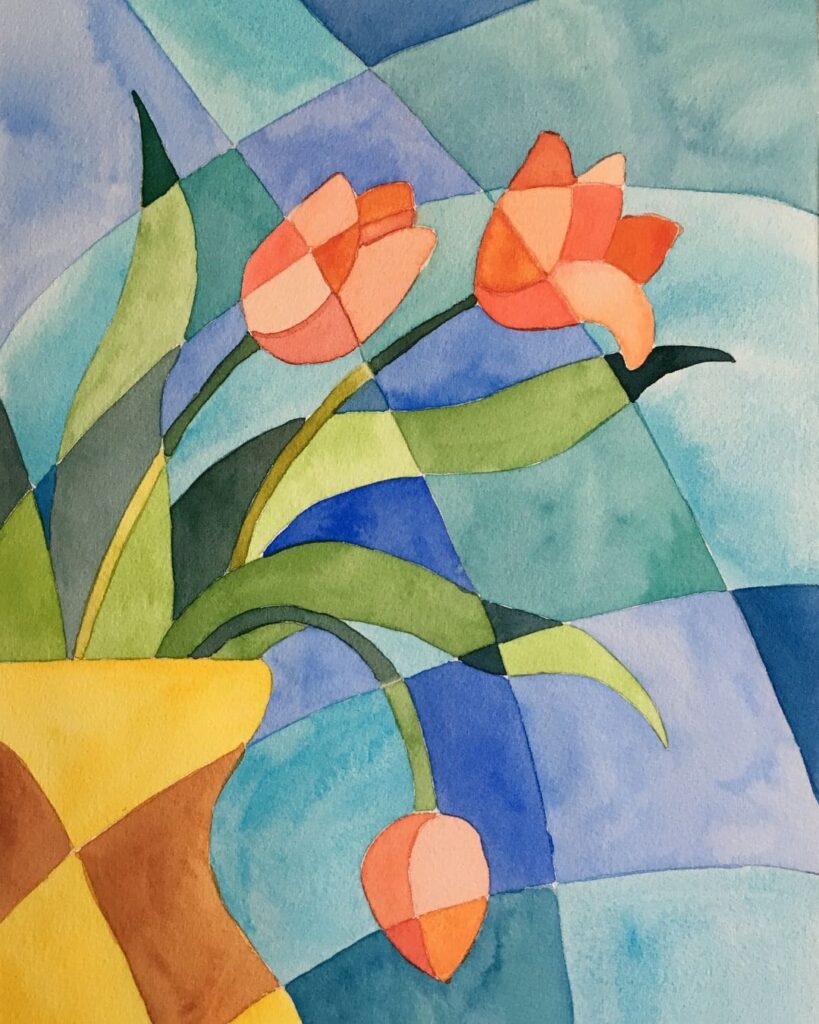
Below, you can see another version of this painting where I decided not to use the black outlines.
Step 6: Share Your Work!
Thanks for joining me: Thank you so much for giving this project a try! I hope you had a great time and learned something new. I would love to see what you created.
A Friendly Reminder: This tutorial is just for your personal practice and learning.
Please do not use this design, these photos, or these instructions for commercial products (selling things).
Since this design is based on my original sketch, please do not enter your painting into art shows or contests.
What’s Next? Ready for something a little harder? Check out my next challenge here.
Support Free Art Education: If you enjoyed this lesson and want to support my work, you can ‘buy me a coffee.’ Pay whatever you can—every donation helps me keep making art accessible to everyone. [Donate here].
Thank you!