
Exploring new surfaces for watercolor can be both exhilarating and a bit daunting. Recently, I’ve stepped away from my usual paper to experiment with Aquabord—an acid-free, textured, and absorbent clay panel specifically engineered to hold watercolor beautifully.
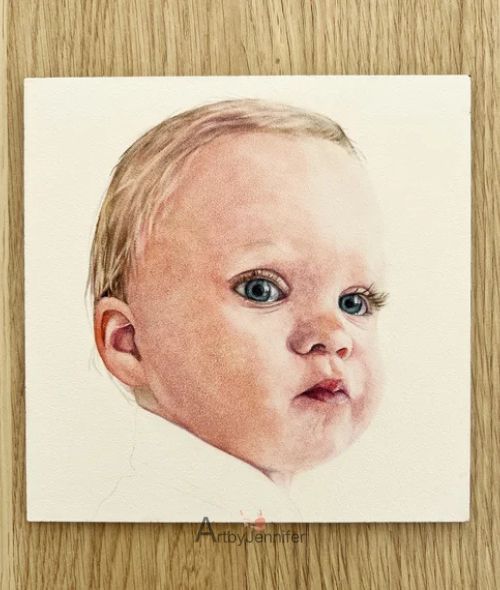
I’m thrilled to share my findings with you, though I’ll be the first to admit I’m still navigating the “ins and outs” of this unique medium. My latest project was a 6” x 6” flat panel featuring a portrait of my grandson. It was a deeply rewarding experience, and I’d love to walk you through the journey, backed by some progress photos and tips I gathered as the paint dried.

My grandson painted in watercolour on Ampersand Aquabord
With a packed schedule, I wanted to dive into this experiment without feeling overwhelmed. I deliberately chose the 6” x 6” size for a few key reasons:
Learning Curve: Painting on Aquabord is time-consuming. It demands a different rhythm and approach than traditional paper, as the surface interacts with water and pigment in its own distinct way.
Zero Pressure: The smaller format allowed me to focus entirely on mastering the technique. It removed the pressure of filling a large surface, making it the perfect “bite-sized” project for a busy artist.
By starting small, I could treat each square inch as a laboratory for color and texture, ensuring that the process remained joyful rather than stressful.
My Aquabord Painting Process
Before diving into the colors, I started by flooding the surface with a layer of water to release any trapped air—a vital step for this medium. Once the panel was completely dry, I carefully transferred a simple line drawing onto the board, creating a clean roadmap for the portrait to follow.
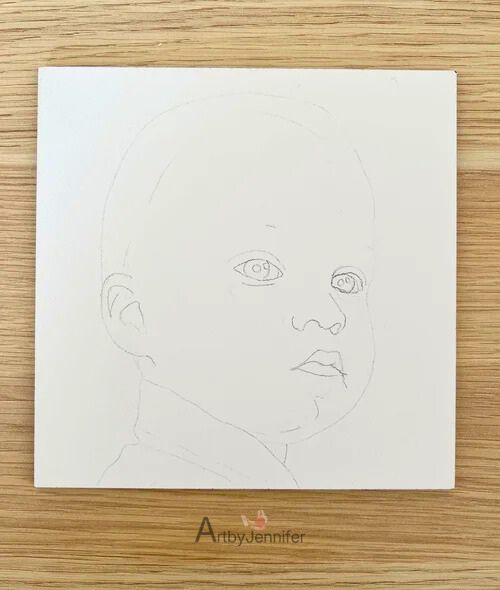
A simple pencil line drawing on the Aquabord.
I began by sweeping a pale wash of Raw Sienna, Permanent Rose, and French Ultramarine across the entire face. After this dried, I mixed a deeper version of those same three hues to meticulously define the darkest features—specifically around the eyes, nose, and mouth. Since experience has taught me that erasers can scuff the Aquabord surface, I bypassed them entirely this time. Instead, I used this darker pigment to “lock in” my sketch, ensuring every vital detail remained visible and crisp throughout the process.
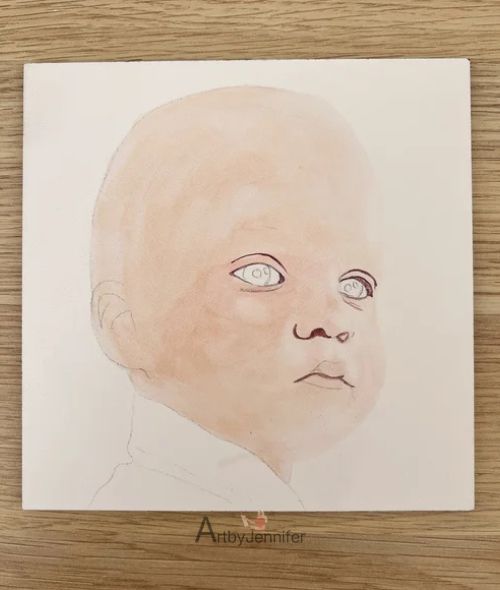
A pale wash of Raw Sienna, Permanent Rose and French Ultramarine over the entire face.
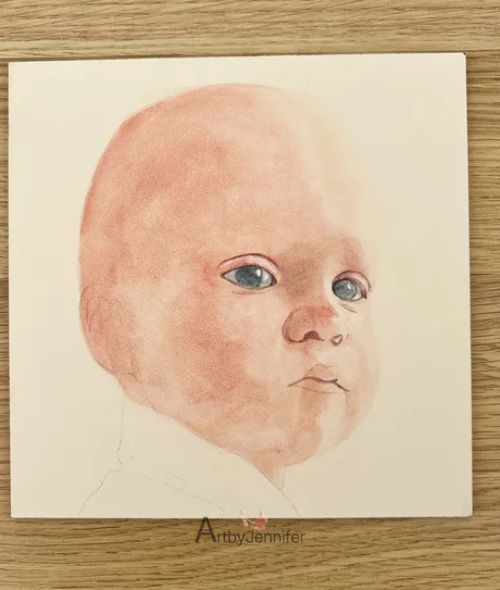
I intensified the base wash with more pigment, using a large round brush to sweep color across the face’s primary shadow regions. I found it helpful to pre-wet the Aquabord—much like prepping watercolor paper for a large wash—to help the paint flow. However, the clay surface is incredibly thirsty and drinks up water far faster than paper, which meant I had to move with speed and precision to keep my edges workable.

I painted the major shadow shape on the face with a darker mixture of the first wash.
Just as with watercolor paper, patience is vital when working on Aquabord; you must wait for the paint to dry completely before layering, or you risk a muddy mess. While washes on this surface often appear patchy at first, I’ve learned to stay calm—these textures can be easily smoothed out with a damp brush later. Once my foundation was dry, I defined the eyes with a blend of Payne’s Grey and French Ultramarine, before moving on to deepen the subtle shadows around the nose.
Beginning to paint the eyes.
I moved on to the ear before tackling the hair. While hair has always been a struggle for me on watercolor paper, it is a joy on Aquabord because the surface allows for effortless lifting to create highlights.
I’ve found it’s best to work from dark to light here; I started by blocked in the hair as one solid, dark mass. Once dry, I used an eradicator brush to lift out the lighter strands. By repeating this cycle—layering pigment and lifting highlights—I was able to build depth and texture until the hair looked just right.
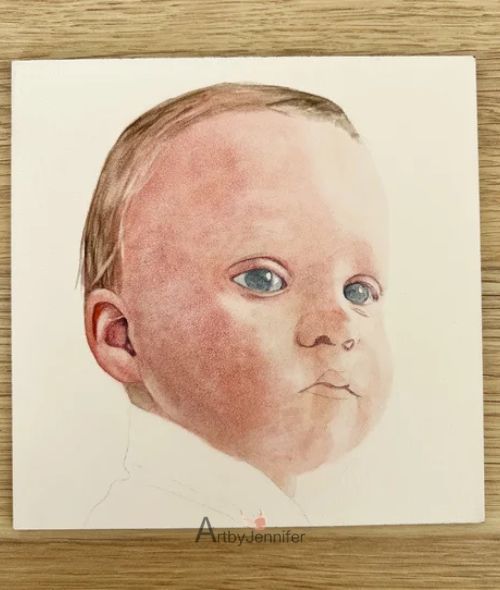
Beginning to paint the hair
I reached a major breakthrough at this stage. Previously, I treated Aquabord just like watercolor paper, but I’ve come to realize this surface demands its own set of rules. Traditional techniques simply don’t translate the way you’d expect.
For example, the wet-on-wet method—my go-to for creating soft facial features on paper—doesn’t yield the same results here. Instead, I discovered a much more effective workaround: painting shadows onto a completely dry surface. Once dry, I use a synthetic filbert brush to gently buff the edges.
This “dry-then-soften” approach worked like a charm for the subtle transitions around the nose and mouth. The logic is simple: apply the shadow, let it set, and then lightly rub the boundary with a damp synthetic brush to achieve a perfectly seamless fade.
With softened edges
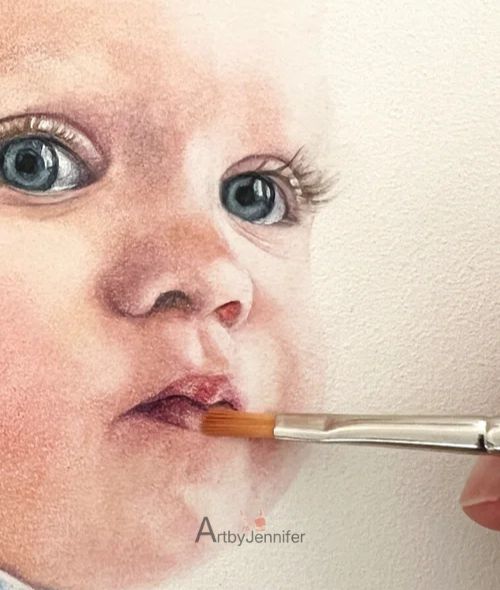
Softening edges with a synthetic filbert brush
Mouths have always been a challenge for me, but I’ve realized the secret is to treat them as a natural extension of the skin, where colors transition smoothly rather than stopping at sharp lines. Using a synthetic brush, I carefully blurred the edges to achieve that soft, realistic look.
As I neared the end, I noticed the skin tone felt a bit too pink; to fix this, I glazed a thin wash of Raw Sienna over the shadowed side, adding a hint of yellow to balance the warmth. Finally, I painted the shirt in French Ultramarine. Once it was dry, I deepened the shadows under the collar with a more concentrated mix and lifted away some highlights with my filbert brush to give the fabric form.
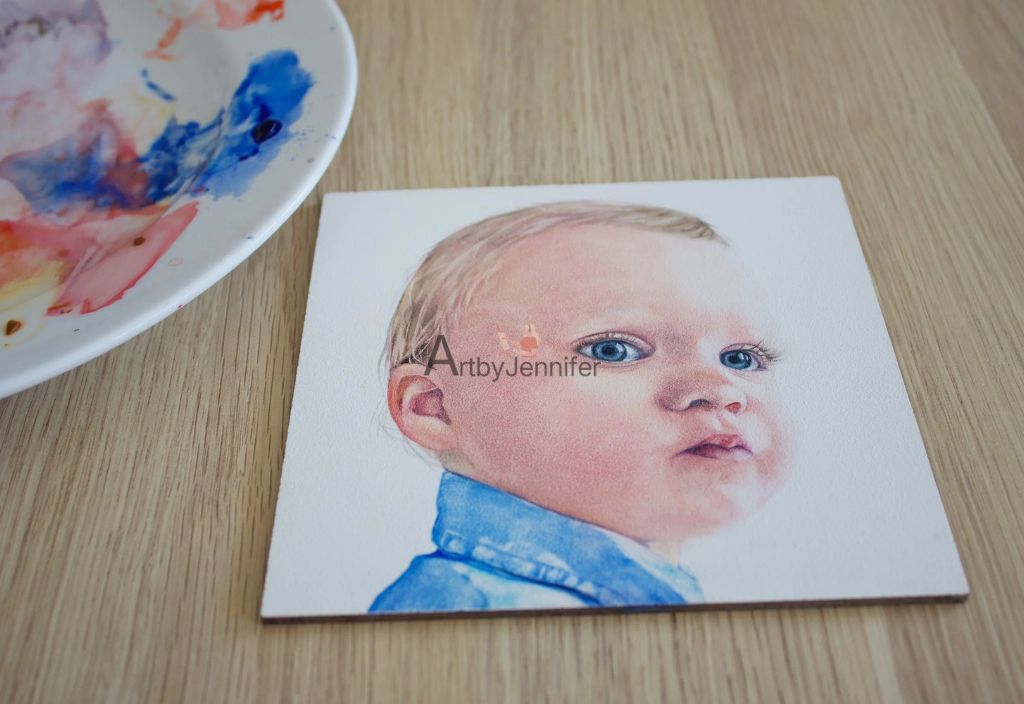
Aquabord is a textured coated hardboard panel
I gave it a few coats of spray varnish and it was ready to be framed in an Ampersand Duoframe.
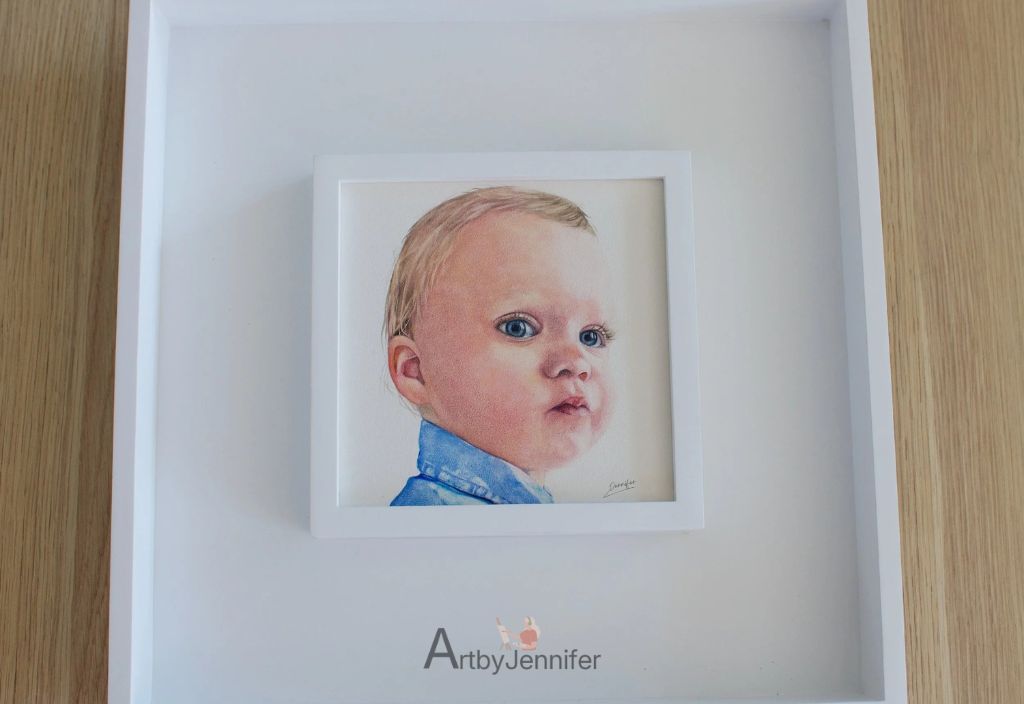
After several light coats of Krylon varnish, the piece was finally ready for framing. I’m a big fan of this specific varnish because it provides a remarkably durable, archival finish. It not only protects the delicate layers of paint but also ensures the portrait stays vibrant for years to come, allowing the artwork to be displayed confidently without the need for protective glass.
Painting on Aquabord is a fascinating journey, and I hope sharing my process helps you navigate the quirks of this unique surface.
Despite the initial learning curve, the ability to lift and manipulate paint with such ease has opened up entirely new creative possibilities for me. This small 6×6 panel proved to be the perfect “playground” for exploring these techniques, and I’m absolutely thrilled with the results. If you’re considering making the switch, remember to embrace how it differs from traditional paper and give yourself the grace to experiment.
Thank you for joining me on this artistic adventure! I can’t wait to hear about your own experiences and discoveries with Aquabord.